Choosing your cladding panels for walls and ceilings

To help you make the best possible choice for your resurfacing project, here are a few tips on the features and uses of gypsum and cement board panels.

Types of panels

The right panel in the right location

There are specific panel types and sizes available depending on how they will be used. Here are a few examples based on the most common projects:
Panel type
Common sizes
Use
Gypsum ¼"
  • 48" x 96"
  • 48" x 120"
  • 48" x 144"
  • To cover the surface of an existing wall that is badly damaged
  • For uneven surfaces
  • Can install a double layer to improve soundproofing.
Gypsum 3/8"
  • 48" x 96"
  • 48" x 120"
  • 48" x 144"
  • To repair an existing wall made of panels of the same thickness
  • Can install a double layer to improve soundproofing and fire resistance.
Gypsum ½"
  • 48" x 96"
  • 48" x 120"
  • 48" x 144"
  • For standard use on walls and
  • Can use a double layer to improve soundproofing and fire resistance.
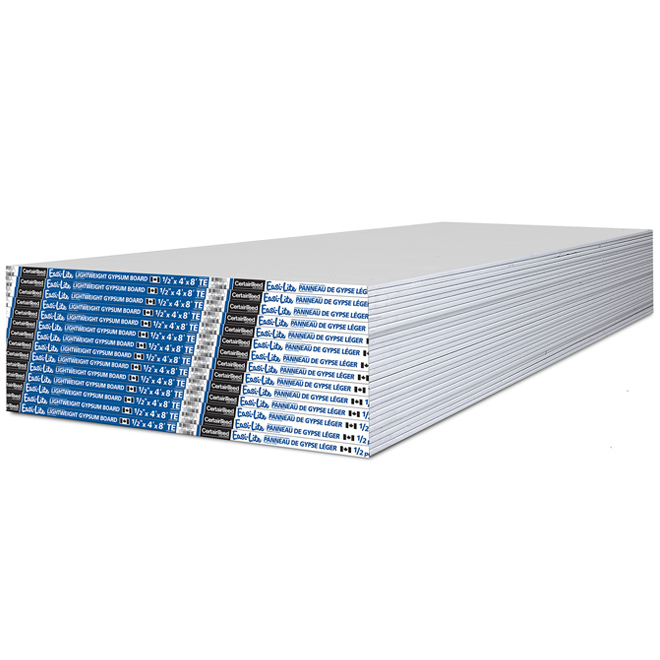
Gypsum ½" light
  • 48" x 96"
  • 48" x 120"
  • 48" x 144"
  • For standard use on
  • Lighter than regular gypsum panels, therefore easier to hang.
Gypsum 5/8"
  • 48" x 96"
  • 48" x 120"
  • 48" x 144"
  • Required by insurance companies in the construction of residential garages, as a single layer provides greater fire resistance than regular ½" panels.
  • These panels are also more impact resistant.
Type X gypsum, ½" and 5/8"
  • 48" x 96"
  • 48" x 120"
  • 48" x 144"
  • For garages, workshops and all walls/ceilings required by safety standards to be built with fire-retardant materials.
  • Type X panels contain additives that make them more fire resistant than regular panels of the same thickness.
  • Not to be used directly behind a high heat source such as a furnace without a fire barrier wall made from cement panels.
Water-resistant gypsum (greenboard), ½" and 5/8"
  • 48" x 96"
  • 48" x 120"
  • 48" x 144"
  • For the bathroom, laundry room and any area prone to high humidity and moisture. Can be used around the bathtub if covered with tiles.
  • Some panels contain additives that improve their resistance to mould.
  • Not to be used in shower stalls. Instead go for “Permabase” cement in showers.
"Finex" cement board, ¼" or ½"
  • 48" x 48"
  • 48" x 96"
  • Can be used as a regular subfloor
  • Can be used as a fire-retardant barrier both for the floor (1/2") and for walls (1/4") near a furnace or stove.
"Permabase" cement board, ½"
  • 32" x 60"
  • 48" x 96"
  • Can be used as a substrate for tiled countertops, floors or walls (shower stalls).
  • The 32" x 60" format is ideal for walls around alcove bathtubs.

Calculating quantities

A successful project starts with careful planning and by calculating the right quantity of materials you will need. Here are a few tips:

  1. Choose a panel size that will be easy to install in the room.
  2. Measure the width and length of the walls and ceiling.
  3. Calculate the total surface area to be covered, i.e. the wall area plus the ceiling area.
  4. Divide this number by the surface area of your chosen panel (32 sq. ft. for a 4" x 8" panel and 48 sq. ft. for a 4" x 12" panel). The result gives you the number of panels you will need to cover the whole area.
  5. For 100 sq. ft. you will need:
    1. 6 lb of nails or 0.3 lb of screws
    2. 1 gallon of joint compound
    3. 37' of joint tape
  6. Stagger the panels so you are not left with one continuous joint running up the wall or along the ceiling that might be difficult to conceal.

All drywall panel accessories

Pro Tip

To avoid making several trips to the store, add 5% of materials to your calculations to include losses that will inevitably happen when you install the panels. To consult the various steps required to install gypsum panels, read the DIY gypsum panel installation project.

Calculator

Estimate the required quantities for your wall and ceiling panel installation project with our gypsum panels calculator.
Calculator – Gypsum Panels

Installing cement panels

Here are a few tips to ace the different steps required when you install your cement panels:

Fastening

  • Some cement panels must be pre-drilled or countersunk (with special concrete bits) while others can be screwed in place directly with standard or self-drilling concrete screws.
  • Always read the manufacturer's instructions for the correct screws to use.
  • Keep the screws at least 5/8" from the edges of the board to prevent it from chipping.

Cutting

Finishing

For both types, a 1/8" expansion joint must be left between panels:

  • On "Permabase" type panels, this expansion joint is finished by covering the seam with fibreglass mesh—not drywall tape—pressed into a mortar composed of latex-fortified cement. The surface can then be tiled; the same latex-fortified mortar must be used to set the tiles.

On "Finex" type panels, the expansion joint must be filled with flexible adhesive sealant if the boards are installed as a subfloor. If they are used to build a fire-resistant wall, do not use sealant and do not cover the panels with cladding such as tiles or faux brick. Heat-resistant paint can be used, after having neutralized the alkalinity in the board using a product recommended by the manufacturer.

The right tools and accessories

The following basic tools and equipment are needed to install wall panels. With adequate tools, you will have every chance to achieve a job well done.

Suggested products

See all panels