How-to fix holes and dents in drywall

Small, clean holes in drywall can be quickly repaired with spackling compound or wood filler. Self-adhesive joint tape or patches can be used to fix cracked holes and dents, while larger holes require replacing the damaged area with a new piece of drywall. Here’s how to do it.

Notes

  • Use spackling compound or wood filler to hide screw heads as well as finishing nails. Spackle is used for repairing drywall.
  • Wood filler is weather-resistant, does not contract, is available in an assortment of colours and may be sanded and painted.
  • If the holes and cracks continually reappear use flexible filler.
  • Once the repair job is done it is recommended that the entire wall be painted to better conceal the repair.
1

Patch a hole up to 2" in diameter

If the hole is clean with no cracks or damage surrounding it:
  • 1.1 - Lightly sand the edges to improve the adhesion of the spackling compound or wood filler.
  • 1.2 - Wipe the surface clean with a damp cloth to remove the dust.
  • 1.3 - Fill the hole with spackling compound or wood filler so that the product overflows slightly from the edges.
  • 1.4 - Spread the excess so that it forms a small bulge. Let dry.
  • 1.5 - Sand the surface until it is smooth and blends with the original surface.
  • 1.6 - Repeat the previous steps if the hole is not completely filled, until the patched area blends with the original surface.
2

Patch a hole with cracked edges

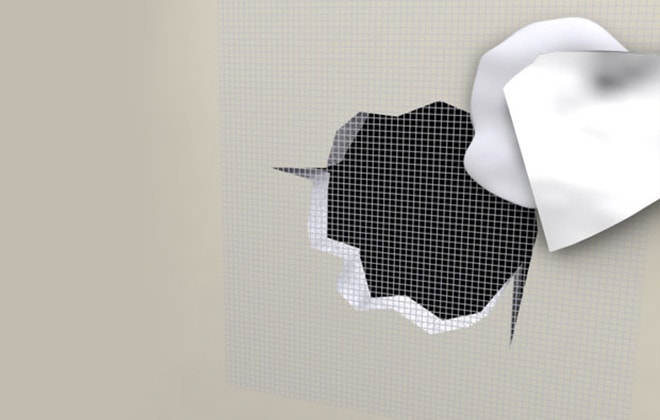
For cracked or broken surfaces, use self-adhesive mesh repair tape to cover the area.
  • 2.1 - Lightly sand the surface in a 1' - 2' area around the hole.
  • 2.2 - Wipe the surface clean with a damp cloth to remove the dust.
  • 2.3 - Cut a piece of repair tape to cover the hole.
  • 2.4 - Press the tape over the hole. Apply light pressure so as not to compromise the strength of the drywall.
  • 2.5 - Coat the tape and surrounding area with spackling compound.
  • 2.6 - Spread a second layer of spackling compound thinner and thinner as you move away from the hole.
  • 2.7 - Let dry.
  • 2.8 - Sand the surface then wipe it with a damp cloth.
  • 2.9 - Repeat the process as many times as necessary to ensure that the repaired area blends seamlessly with the original surface.
3

Patch holes 2" - 5" in diameter with a self-adhesive repair patch

  • 3.1 - Wipe the surface clean with a damp cloth to remove the dust.
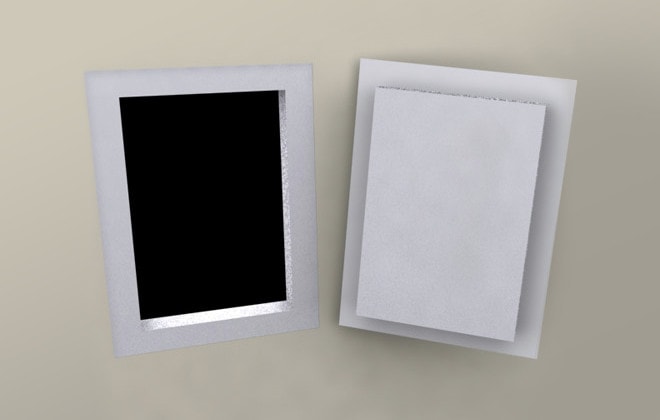
  • 3.2 - Remove the backing from the self-adhesive patch and stick over the hole.
  • 3.3 - Coat with spackling compound using a trowel, and let dry.
  • 3.4 - Spread a second layer of spackling compound, thinner and thinner as you move away from the hole.
  • 3.5 - Let dry.
  • 3.6 - Sand the surface then wipe it clean with a damp cloth.
  • 3.7 - Repeat the process as many times as necessary to ensure that the repaired area blends seamlessly with the original surface
4

Repair large holes with a new piece of drywall

  • 4.1 - Trace the outline of a rectangle around the hole.
  • 4.2 - Check for utilities such as pipes and electrical cables. If any are present, mark their position on the outside of the wall.
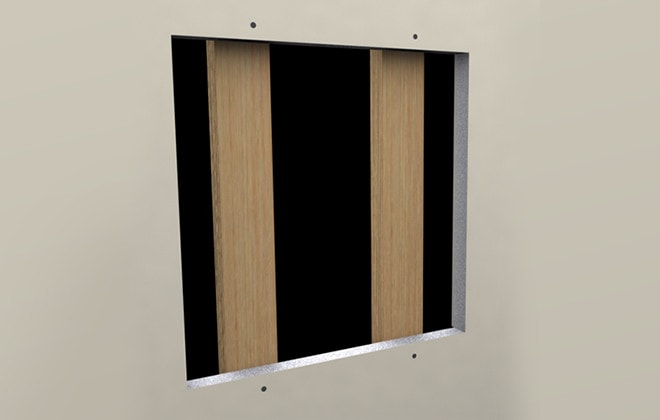
  • 4.3 - Cut out the damaged drywall and clean the edges of the hole.
  • 4.4 - Cut two wood laths, 3" longer than the height of the hole.
  • 4.5 - Mark the end of the laths at 1 ½"
  • 4.6 - Place one of the laths vertically behind the wall, aligning the marks with the top and bottom of the hole.
  • 4.7 - Hold the lath in place and screw through the drywall into each end using 1 ¼" coarse drywall screws.
  • 4.8 - Repeat for the second lath.
  • 4.9 - Measure the opening and trace these dimensions onto the piece of undamaged drywall board.
  • 4.10 - Cut out the new section.
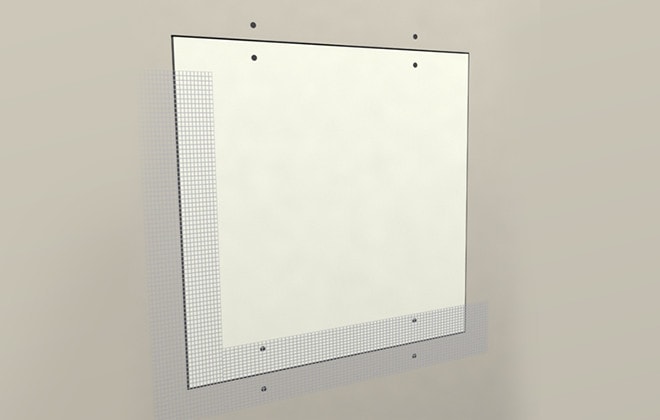
  • 4.11 - Insert the section of drywall into the hole and screw it to the wood laths.
  • 4.12 - Lightly sand the surface in a 1' - 2' area around the hole.
  • 4.13 - Wipe the surface clean with a damp cloth to remove the dust.
  • 4.14 - Apply adhesive-backed fibreglass wallboard tape over the joints.
  • 4.15 - Cover with spackling compound using the taping knife.
  • 4.16 - Spread less and less compound as you move farther away from the hole. Let dry.
  • 4.17 - Sand, wipe clean with a damp cloth, and repeat the process until the repaired section blends seamlessly with the original surface.

Suggested products