Share
Do it yourself

How to Build a Decorative Room Divider Wall

Learn how to divide a multi-functional area with a stylish room divider wall. This is the perfect solution to make a small space work for the whole family.

Difficulty level: Pro
Duration: 1 day
Download the construction plan
Safety Notice
To build a solid room divider, choosing the right location is key. The divider must be securely fastened in three places:
  • On the ceiling, to a joist or truss;
  • On the wall, to a stud; and
  • On the floor, regardless of the flooring.

You may need to add framing to your structure. Once you’re satisfied that your fastening is safe, you can go ahead and measure your room to make a detailed plan for your project. Let’s get started!
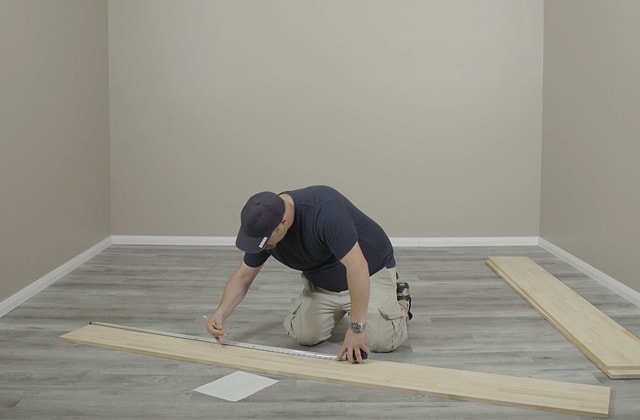
Person measuring a wood plank
1

Measure and Cut the Wood

  • 1.1 - Follow your plan and measure the top and bottom planks, the side pieces, and the two alcove pieces. Make sure that the length of the divider is 1 ½" shorter than the length of the wall.
  • 1.2 - Using a table saw and a stop block, cut all the planks 5 ½" wide.
  • 1.3 - Create a template for the spacing between the planks. Here, we’ve chosen 1½" spacing.

Pro Tip

Because the divider will be assembled on the floor and then lifted and installed, it’s important that the length of the divider be 1 ½" shorter than the length of the wall. This is when you realize how important it is to have a good plan and for it to be to scale!

For this project, we chose laminated pine planks for their stability. But you can choose other materials, as long as you opt for lighter types of wood so that the wall won’t be too heavy.
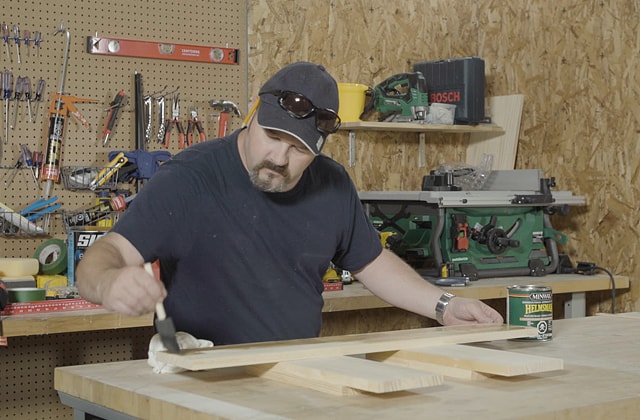
Person apply varnish to a wood plank
2

Sand and Varnish to Suit Your Style

  • 2.1 - Sand each piece until smooth.
  • 2.2 - Apply two coats of paint or stain to all pieces, depending on the material chosen and the desired appearance, sanding with 300-grit finishing sheets between coats.

Pro Tip

You may be tempted to paint or stain your project at the very end. Our expert tip—do it before you assemble the divider so that:
  • The finish looks better.
  • It’s easier to apply.
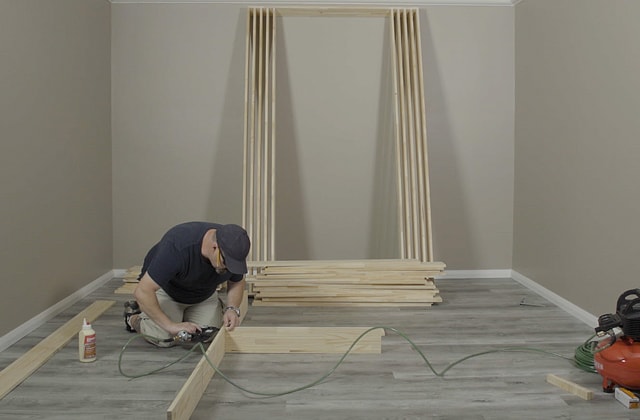
Person assembling a wood structure on the floor
3

Assemble the Frame on the Floor

  • 3.1 - Assemble the structure’s frame on the floor using a carpenter square. The frame must be straight and perfectly square.
  • 3.2 - Apply wood glue, then nail the pieces together to form the frame. Again, make sure everything is perfectly straight.
  • 3.3 - Before continuing, double-check your measurements.
  • 3.4 - Start installing the interior planks. Use your template to ensure that the spacing between the planks is equal.
  • 3.5 - Place one plank at each end.
  • 3.6 - Strengthen the structure by adding screws, making sure to pre-drill the holes first to avoid cracking the wood.
  • 3.7 - Wait before installing the interior planks that make up the alcove. It will be built separately.
Person assembling a wooden structure on the floor
4

Build and Install the Alcove

  • 4.1 - Use the planks that will go on the top and bottom of the alcove as guides to mark your interior planks.
  • 4.2 - Follow your plan for the other two pieces.
  • 4.3 - Glue, nail, and screw the pieces together.
Person using a pneumatic nailer
5

Install the Remaining Planks

  • 5.1 - Place the alcove and fasten it to the structure.
  • 5.2 - Using the template, secure the remaining planks with glue, nails, and screws.
Person removing moudling using an oscillating tool
6

Install the Divider Wall

  • 6.1 - Choose the location of the divider, measuring its width and length on the wall to make sure there is enough space.
  • 6.2 - Using a stud finder, find a stud in the wall and one in the ceiling.
  • 6.3 - Measure and cut the moulding.
  • 6.4 - Install two planks of the same length as the divider; one plank for the bottom and one for the top.
  • 6.5 - Screw the two planks firmly into place. These planks will help anchor the structure.
  • 6.6 - Add construction adhesive to the wall.
  • 6.7 - Place the divider with the help of two or three other people, then screw it in firmly.
  • 6.8 - Hide the screw holes using wood filler or wood plugs.

Pro Tip

If you can’t find studs in the chosen location, you will need to reinforce the structure for safety.
Wooden room divider wall in a basement
Grey room divider wall
Basement divided by a grey partition wall
7

Admire Your Awesome Room Divider Wall

Check out these two very different—but just as awesome—finishes.

Disclaimer

These how-to videos are provided for informational purposes only. The information contained in RONA’s how-to videos is intended to provide general guidelines to simplify jobs around the house. Because tools, products, materials, techniques, building codes, and local regulations are continually changing, RONA inc. assumes no responsibility for the accuracy of the information contained herein and disclaims any liability for the omissions, errors, or outcome of any project. RONA inc. makes no representation on the feasibility of any project and the viewer bears all risks coming with the realization of the projects. It is the responsibility of the viewer to ensure compliance with all applicable laws, rules, codes, and regulations for a project. The viewer must always take proper safety precautions and exercise caution when taking on any project. If there is any doubt in regard to any element of a project, please consult a licensed professional.

Suggested products

Shop Building Supplies