Share
Do it yourself

How to Install a Pocket Door

Save space and get a streamlined look with a pocket door. It’s the perfect solution for bathrooms, bedrooms, and small rooms since it slides into the wall easily and disappears when it’s open. You’ll also be able to use the space next to the door for decor or furniture!

Difficulty level: Pro
Duration: 1 weekend
Before You Start
You can’t install a sliding door in just any kind of wall. Before even purchasing your materials, make sure the wall is not load-bearing and that it doesn’t have any electrical or plumbing behind it.
Person removing a door frame
1

Measure Everything Out

  • 1.1 - Measure the door opening and the adjacent wall to make sure you have enough space.
  • 1.2 - Cut the latex seal around the moulding using an all-purpose knife and carefully remove it.
  • 1.3 - Remove the doorframe.
  • If the pocket door frame is bigger than your door opening:
  • 1.4 - Measure the height and width of the pocket door frame and mark it on the wall.
  • 1.5 - Trace the full pocket door frame outline on your drywall using a level so you’re cutting as straight as possible.
  • 1.6 - Cut along the traced lines using an oscillating tool, then remove the drywall on each side of the wall.

Pro Tip

The normal height for a door is 82”. For a pocket door to comfortably open and close, you’ll need at least a height of 84”. You’ll have to check that, and then cut and adjust as needed.
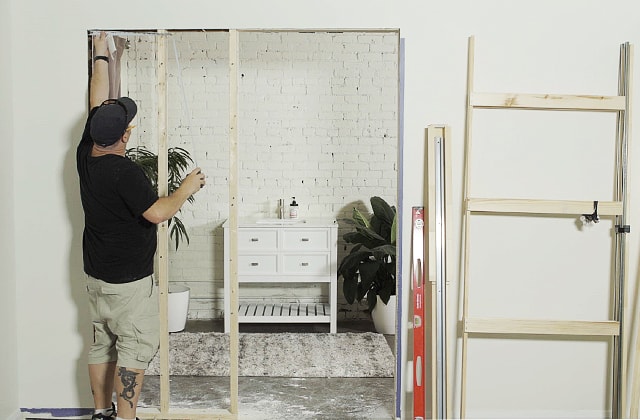
Person rebuilding an interior wall structure
2

Rebuild the Interior Wall Structure

  • 2.1 - Measure the height and space between the studs to cut new brackets.
  • 2.2 - Cut 2” x 4” planks (or 2” x 3” if needed) based on your measurements.
  • 2.3 - Install the new brackets using a level to complete the structure.
  • 2.4 - Cut the studs.

Pro Tip

This is a good time to paint your door and frame if they’re made of natural wood. They’ll dry while you finish the job.
Person installing a pocket door frame
3

Install the Pocket Door Frame

  • 3.1 - Attach the header to the rest of the frame.
  • 3.2 - Insert the frame in the door opening, making sure that it’s level. Use shims as needed.
  • 3.3 - Secure the frame to the structure using screws.
  • 3.4 - Trim any shims that stick out.
Person installing a pocket door
4

Install the Pocket Door

  • 4.1 - Install the bumper on the inside of the door frame, followed by the door mechanism. They need to be 2” from each edge and well centred.
  • 4.2 - Place the wheels on the rail. Make sure you reverse the direction of the wheels for added stability.
  • 4.3 - Line up the door to connect the screws from the mechanism to the wheels, then close the bracket to secure them in place.
  • 4.4 - Place the guides at the entrance so that the door is centred and check that it slides properly. Make adjustments as needed.

Pro Tip

You may need help installing the door. You can also use shims to prop the door up.
Person finishing joints on a wall
5

Close Up the Wall

  • 5.1 - Cut a sheet of drywall to size and screw it to the wall framing using shorter drywall screws to prevent damage to the door.
  • 5.2 - Put drywall tape over all the joints and prepare your drywall compound.
  • 5.3 - Finish all the joints and plug all the screw holes using compound and let it dry. Apply two to three coats—sanding between each one—for a nice, even finish.

Pro Tip

Don’t forget the small space above the door! Use a drywall bit so that the screws don’t go in too deep.
Person installing a lock on a pocket door
6

Install the Pocket Door Lock

  • 6.1 - Measure and mark where the lock will go.
  • 6.2 - Make a cut-out using a jigsaw.
  • 6.3 - Insert and install the lock according to the manufacturer’s instructions.
  • 6.4 - Reinstall the right-hand section of the door frame.
  • 6.5 - Close the door to mark the second section of the lock.
  • 6.6 - Cut the edges to size using an all-purpose knife, then use a router to trim the space needed for the strike plate.
  • 6.7 - Install the strike plate.
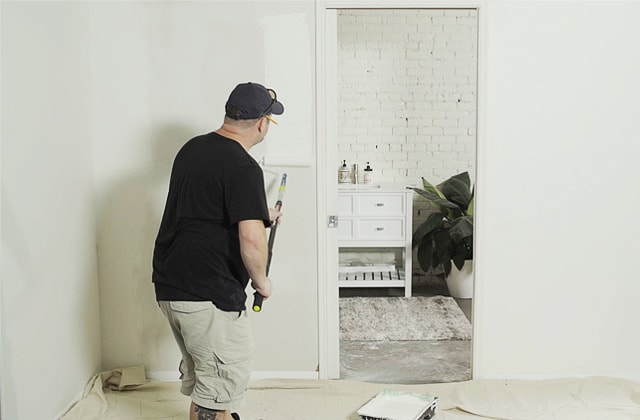
Person painting a wall
7

Finishing Touches

  • 7.1 - Close the door. Install a piece of trim on each side to line the door up properly.
  • 7.2 - Reinstall the moulding around the door, adding a little wood glue in the joint before nailing it in place.
  • 7.3 - Lightly sand the plaster, then apply two coats of paint.

Pro Tip

Leave 1/8” gaps all around the door. You can then apply a latex seal for a better finish.
Light grey room with a pocket door
8

Admire Your Awesome New Pocket Door

Disclaimer

These how-to videos are provided for informational purposes only. The information contained in RONA’s how-to videos is intended to provide general guidelines to simplify jobs around the house. Because tools, products, materials, techniques, building codes, and local regulations are continually changing, RONA inc. assumes no responsibility for the accuracy of the information contained herein and disclaims any liability for the omissions, errors, or outcome of any project. RONA inc. makes no representation on the feasibility of any project and the viewer bears all risks coming with the realization of the projects. It is the responsibility of the viewer to ensure compliance with all applicable laws, rules, codes, and regulations for a project. The viewer must always take proper safety precautions and exercise caution when taking on any project. If there is any doubt in regard to any element of a project, please consult a licensed professional.

Suggested products