Share
Living room with a forest-inspired ombré mural
Do it yourself

How to Paint a Forest-Inspired Ombre Accent Wall

An ombre wall reminiscent of the forest adds depth to any room while creating a wispy look. In addition to being super trendy, this artsy wall painting technique is accessible to all! Discover how to make your own in just a few simple steps.

Colour Palette

A minimum of 3 colours is usually necessary to create a nice, wispy look. To add more depth to this wall design, we chose a 4-colour palette.

Choose a colour that you like, then take the other shades from SICO’s curated palette to ensure a perfect match. For the fourth colour, simply add a very light shade to match, or a white!
Person drawing a sketch
1

Select a Design

  • 1.1 - We decided to go with a forest look that is perfectly aligned with the biophilia, well-being, and escapism trends. Bringing nature into the home—especially when you live in the city or in a tiny apartment—promotes relaxation. It’s also possible to use shades of blue to recreate the calming effect of water or the sky.
  • 1.2 - To nail the forest look, we chose to use the lightest colour at the top and the darkest at the bottom, working our way down. On the other hand, going from one corner to the other would give this wall decor a more abstract look and feel. Also, extending the last colour across the ceiling would create an enveloping and soothing effect.
  • 1.3 - Once you’ve chosen your colours, sketch out a quick mock-up to get an idea of the overall composition and movement.
2

Get Ready to Paint

  • 2.1 - Remove electrical cover plates on the wall.
  • 2.2 - Use painter’s tape to protect surfaces that won’t be painted, including mouldings.
  • 2.3 - Place a tarp or drop cloth on the floor.
Person trimming a wall with paint
Person painting a wall
3

Paint the Wall

  • 3.1 - Using a wooden stick, stir the paint that will be used for the background. This will be the first colour of our ombré wall, at the top.
  • 3.2 - Dip the angled paintbrush into the paint and wipe off its sides, removing any excess.
  • 3.3 - Trim along the edges of the wall on both sides, along the ceiling, and along the baseboard.
  • 3.4 - Using a paint roller and starting a few inches from the upper left corner, paint down to the baseboard, and then back up to the ceiling. Roll back into the painted section with each new strip, working your way into the wall. Avoid bumping into the ceiling or the other walls.
  • 3.5 - Allow the paint to dry completely.
  • 3.6 - Repeat the steps above to apply a second coat.
  • 3.7 - If needed, apply a third coat.

Pro Tip

Drying time will be shorter if you use a fan. While the recommended drying time is usually 4-8 hours, you will find that the paint is dry to the touch in only 20-30 minutes.
Person using a laser level to trace a line
4

Mark the Sections

  • 4.1 - Measure from floor to ceiling and divide the wall into 4 horizontal sections. Your colours will be overlapping into the section above it, so give yourself a 6-12” buffer.
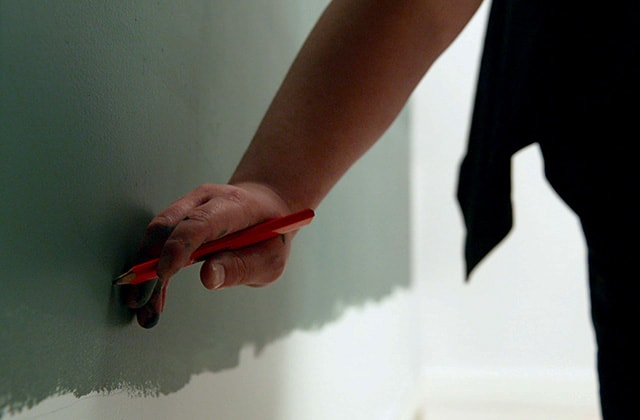
  • 4.2 - Using a pencil, lightly trace two straight bottom lines.
  • 4.3 - Freehand the line closest to the ceiling to get an organic, soft, wavy look.
Person applying paint with a roller
Person painting a forest landscape
Person applying green paint on a wall
Person freehanding a wavy line on a wall
Person finalizing a forest-inspired mural
5

Create the Forest Landscape

  • 5.1 - Trim and roll the second colour between the upper wavy line and the straight line below.
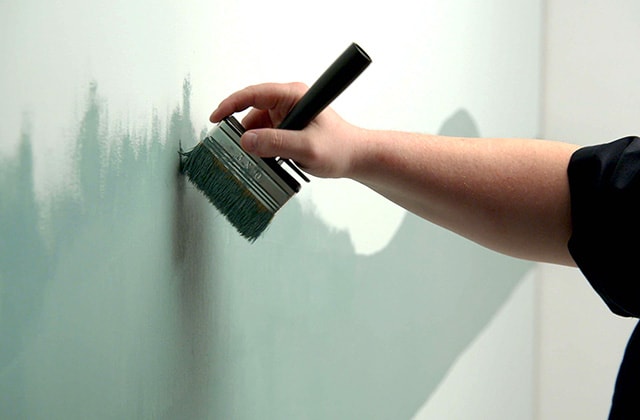
  • 5.2 - While the paint is still wet, grab a stain brush.
  • 5.3 - Working 1’ or 2’ at a time, dip the brush in paint and work it in upward strokes. Move the brush around at different angles to achieve that irregular effect.
  • 5.4 - Use the corner of the bristles to dry brush over the strokes you just made to create that smudgy, textured treetop look.
  • 5.5 - Take a step back to look at the overall landscape and adjust it if needed.
  • 5.6 - Using a paint roller, apply a second coat to conceal any streaks in the lower part.
  • 5.7 - Allow the paint to dry completely on the wall, but make sure not to wash the stain brush in between sections. It must be completely dry at all times.
  • 5.8 - Repeat the steps for the two remaining colour blocks.

Disclaimer

These DIY projects are provided for informational purposes only. The information contained in RONA’s DIYs is intended to provide general guidelines to simplify jobs around the house. Because tools, products, materials, techniques, building codes, and local regulations are continually changing, RONA inc. assumes no responsibility for the accuracy of the information contained herein and disclaims any liability for the omissions, errors, or outcome of any project. RONA inc. makes no representation on the feasibility of any project and the viewer bears all risks coming with the realization of the projects. It is the responsibility of the viewer to ensure compliance with all applicable laws, rules, codes, and regulations for a project. The viewer must always take proper safety precautions and exercise caution when taking on any project. If there is any doubt in regard to any element of a project, please consult a licensed professional. 

Suggested Products

SHOP PAINT ACCESSORIES