Share
Bamboo countertop with a blue herringbone accent wall
Do it yourself

How to Create a Herringbone Accent Wall

You can easily create a herringbone accent wall with a two-toned wallpaper effect that enhances any room by painting repeated and consistent patterns either by hand or using a stencil. All you need is a bit of paint, some time, and a good deal of concentration! Discover how to make your own faux wallpaper in just a few simple steps!

Difficulty level: Easy
Duration: 5 hours
Before You Start
For this project, we chose the SICO Prestige interior paint with primer. This durable finish offers exceptional resistance to dirt and marks from cleaning, which is perfect for a laundry room, kitchen, or entrance.
1

Select a Design

To create a wallpaper look, repetition and consistency are key. Keep in mind that the larger the pattern, the more you’ll lose this effect. The goal is to have a large number of repetitions.

Keep the following in mind when choosing your design:
  • Pattern: There are endless options, from lines to brush strokes to dots. Simple, geometric shapes are easier to reproduce.
  • Colours: You can go for a soft two-toned look or opt for greater contrast by using complementary colours. The sky is the limit!
  • Technique: Freehanded or stenciled or stamped? Brush or sponge? Freehanding with a sponge will create a slightly imperfect and textured pattern that would give the space a boho feel, while using a stencil and a brush will help you nail a sleeker look. A stamp is also a useful tool to fake the look of wallpaper.

We chose a trendy herringbone pattern.
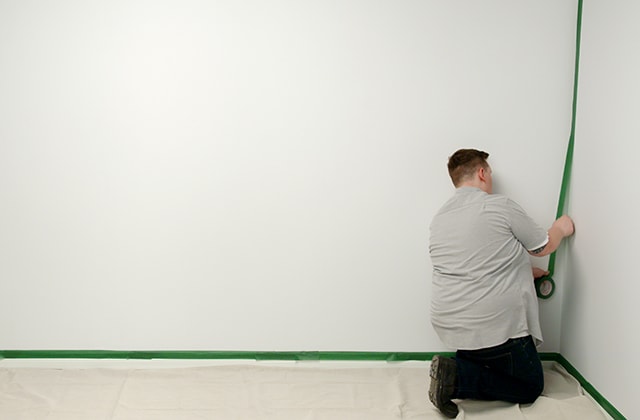
Man applying masking tape around a wall
2

Get Ready to Paint

  • 2.1 - Remove all electrical cover plates on the wall.
  • 2.2 - Use masking tape to protect surfaces that won’t be painted, including mouldings.
  • 2.3 - Place a tarp or drop cloth on the floor.
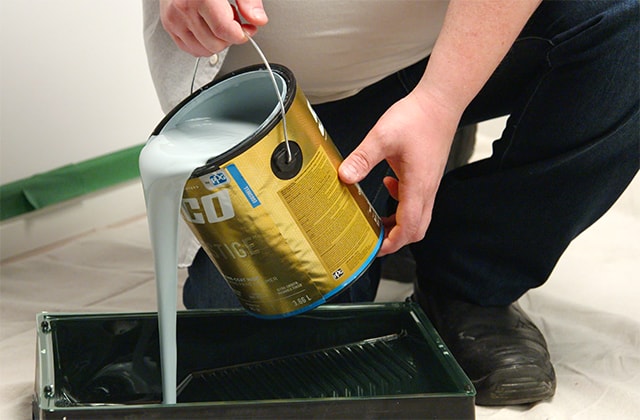
Man pouring paint into a pan
Man trimming moulding with blue paint
Man painting a wall blue
3

Paint the Wall

  • 3.1 - Using a wooden stick, stir the paint that will be used for the background.
  • 3.2 - Dip the angled paintbrush into the paint and wipe off its sides, removing any excess.
  • 3.3 - Gently glide the brush along the trim to coat the edges, the ceiling, and the mouldings.
  • 3.4 - Using a paint roller and starting a few inches from the upper left corner, paint down to the baseboard, and then back up to the ceiling. Roll back into the painted section with each new strip, working your way into the wall. Avoid bumping into the ceiling or the other walls.
  • 3.5 - Allow the paint to dry completely.
  • 3.6 - Repeat the steps above to apply a second coat.
  • 3.7 - If needed, apply a third coat.

Pro Tip

Drying time will be shorter if you use a fan. While the recommended drying time is usually 4-8 hours, you will find that the paint is dry to the touch in only 20-30 minutes.
Person using a tape measure and a pencil on a wall
Man applying painter’s tape on a wall
4

Trace Reference Lines

  • 4.1 - Measure the width of the wall.
  • 4.2 - Divide that number into the desired number of herringbone strips.
  • 4.3 - Using a pencil and level, extend each mark vertically on the wall to create evenly spaced and straight columns.
  • 4.4 - Then, measure the floor-to-ceiling height and calculate how many pattern repetitions you’ll need so that the spacing is consistent across the entire wall.
  • 4.5 - Mark the measurements on the wall to create a grid.

Pro Tip

You can also tape off all vertical lines and use the masking tape to make sure the space between all herringbone strips is consistent! Simply line up the middle of the tape with the reference line.
Person using a template to create a wall pattern
Man creating a herringbone pattern on a wall
Man removing tape from a wall
5

Create the Pattern

  • 5.1 - There are various possible approaches:

    • Stencil: This will create a more precise chevron that looks identical to all the rest. Dip a sponge or brush into paint and gently dab the outline. Repeat the entire length of your vertical line with however many chevrons you want. This method will give you precise and almost identical chevrons.
    • Freehand: Simply trace the diagonal lines with a brush or the edge of a sponge. The key is to get a good start for each strip.
    • Stamp: You can fold a piece of cardboard in half to create a stamp. Simply dip it in paint and stamp away!

    Regardless of the technique, always make sure to space the lines evenly.
  • 5.2 - Continue tracing the pattern until all strips are covered with chevrons.
  • 5.3 - Slowly pull away the tape, then allow the paint to dry completely.

Disclaimer

Keep a wet cloth handy to smear away any drips or mistakes!

Pro Tip

These DIY projects are provided for informational purposes only. The information contained in RONA’s DIYs is intended to provide general guidelines to simplify jobs around the house. Because tools, products, materials, techniques, building codes, and local regulations are continually changing, RONA inc. assumes no responsibility for the accuracy of the information contained herein and disclaims any liability for the omissions, errors, or outcome of any project. RONA inc. makes no representation on the feasibility of any project and the viewer bears all risks coming with the realization of the projects. It is the responsibility of the viewer to ensure compliance with all applicable laws, rules, codes, and regulations for a project. The viewer must always take proper safety precautions and exercise caution when taking on any project. If there is any doubt in regard to any element of a project, please consult a licensed professional. 

Suggested Products

SHOP PAINT ACCESSORIES