Published on April 27, 2023
How to Create a Limewash Accent Wall with Paint
Recreate the traditional limewash method at home using paint. Read on to know more about the materials, tools, time, and cost needed to create and accent wall that will bring some rustic charm, texture, and a cozy ambiance to any room.
1Protect Your Work Area
- 1.1Clean the wall and ensure it is sound.
- 1.2Use masking tape and place a drop sheet or tarp on the ground to protect the room.
- 1.3Measure the surface to be painted.

2Prepare the Paint
- 2.1Combine 1 cup of water and 1 cup of plaster.
- 2.2Mix until smooth.
- 2.3Add 3 cups of paint and mix until full incorporated.
Pro Tip
Go with a colour choice that appeals to you. For this project, we went with Mourning Dove (6183-31) by SICO, and we recommend similar natural tones like sand beige, clay yellow, or stone grey.

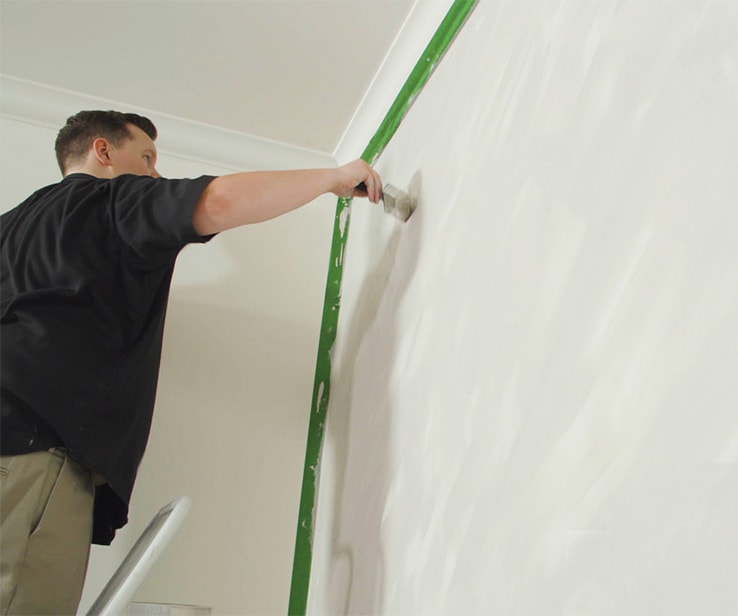
3Apply Coat #1
Pro Tip
Since the paint dries quickly, it is best to avoid cutting. Instead, work in random layers of sweeping strokes to paint the whole wall at once. This will ensure a textured finish and a fantastic contrast.

4Apply the Rest of the Coats
- 4.1Apply three more coats, allowing the paint to dry completely after each coat
- 4.2When the fourth coat is done, remove the tape right away. Don’t wait, or it may be tough to remove later.
Pro Tip
You can enhance the texture of the final coat with more compound—or even a little bit of white paint, without blending it too much.
Your Projects!
Photo: @ariane_bibi


Disclaimer
These DIY projects are provided for informational purposes only. The information contained in RONA’s DIYs is intended to provide general guidelines to simplify jobs around the house. Because tools, products, materials, techniques, building codes, and local regulations are continually changing, RONA inc. assumes no responsibility for the accuracy of the information contained herein and disclaims any liability for the omissions, errors, or outcome of any project. RONA inc. makes no representation on the feasibility of any project and the viewer bears all risks coming with the realization of the projects. It is the responsibility of the viewer to ensure compliance with all applicable laws, rules, codes, and regulations for a project. The viewer must always take proper safety precautions and exercise caution when taking on any project. If there is any doubt in regard to any element of a project, please consult a licensed professional.


