Share
Do it yourself

Mural planter

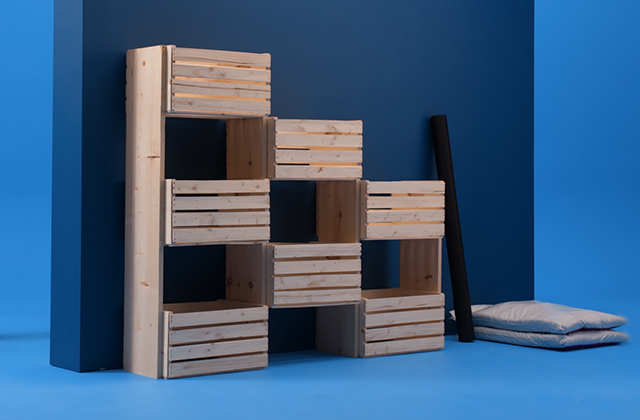
Add greenery to your terrace in less than a day with this inexpensive project. With its seven boxes, this planter is perfect for flowers, vegetables that can grow in pots, and fine herbs.

See the plan for plank dimensions and the assembly instructions.

1

Cut the wood

  • 1.1 - On one board, cut two pieces measuring 49" and 34" in length.
  • 1.2 - On two boards, cut one 58 ½" piece, and two 15" pieces.
  • 1.3 - On the last board, cut six 15" pieces.
2

Assemble the parts

  • 2.1 - Place a side board (piece 1) on the outside of a wooden box. From the inside, pre-drill the box. Screw into place.
  • 2.2 - Place a second board (piece 2) on the other side of the box. From the inside, pre-drill the box, screw into place.
  • 2.3 - Place a reinforcement (piece 4) vertically against the side board, over the wooden box. Pre-drill and screw into place.
  • 2.4 - Verify that the wooden box is level and adjust if need be. Place the top wooden box over the reinforcement pieces. Pre-drill and screw into place.
  • 2.5 - Start the middle section with reinforcement pieces at the bottom of each side board. Pre-drill and screw into place.
  • 2.6 - Place the wooden box on the reinforcement pieces. Pre-drill and screw into place.
  • 2.7 - Follow the instructions on the plan and assemble the rest of the planter. Always place the wooden boxes on reinforcement pieces.
3

Protect the wood

Stain each piece, making sure to cover the cut marks properly.

Pro Tip

Follow the steps of our Stain a deck or outdoor wood structure DIY project to stain your bar counter like a pro.
4

Install the geotextile in the boxes

  • 4.1 - Using an all-purpose knife , cut 7 pieces of geotextile measuring approximately 36" wide x 38" long.
  • 4.2 - Place the geotextile in one of the wooden boxes, making sure to cover the inside entirely.
  • 4.3 - Fold the corners and staple the fabric to the bottom of the box. Also staple the corners and the periphery of the box.
  • 4.4 - Repeat for all the wooden boxes.
5

Secure the planter to the wall

  • 5.1 - Determine the placement of the planter along the wall.
  • 5.2 - Identify the anchor points
  • 5.3 - Secure the planter solidly to the adjacent wall using corner braces on the boards (not on the wooden boxes).
6

Fill the boxes with plants

  • 6.1 - Fill the boxes ¾ of the way with black earth.
  • 6.2 - Plant vegetable crops, fine herbs, or flowers in the planter.

Pro Tip

Put the plants needing the less maintenance in the top boxes and those needing the less sunlight in the bottom boxes.

Suggested products