Share
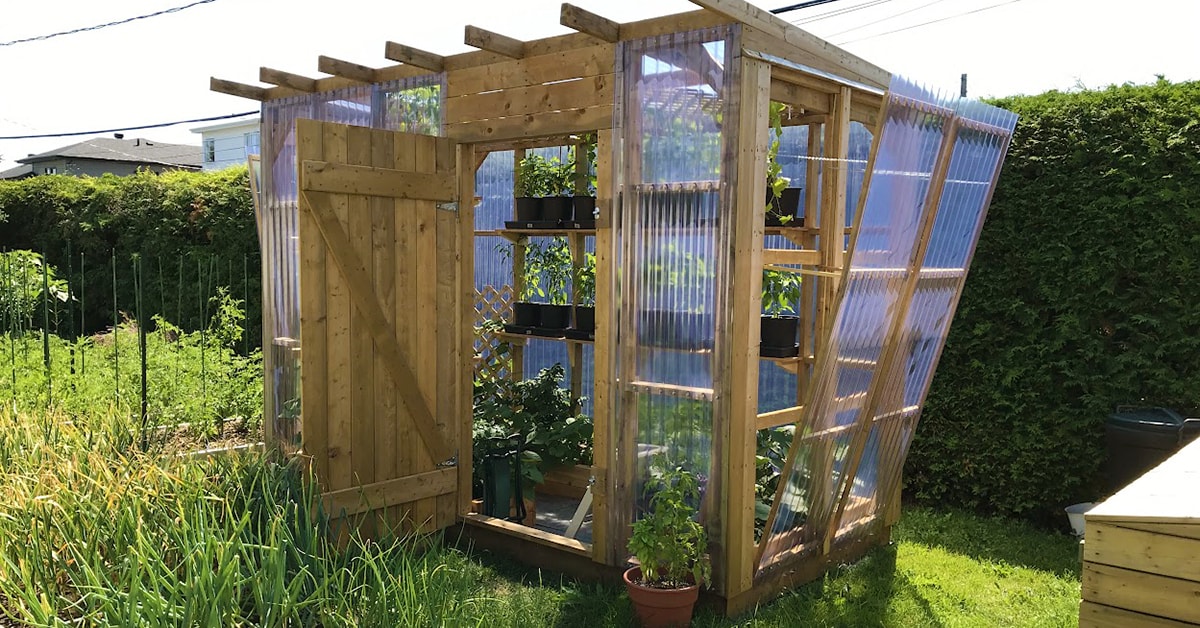
Residential greenhouse made of pressure-treated wood

Published on April 8, 2024

Do it yourself

How to Build Your Own DIY Backyard Greenhouse

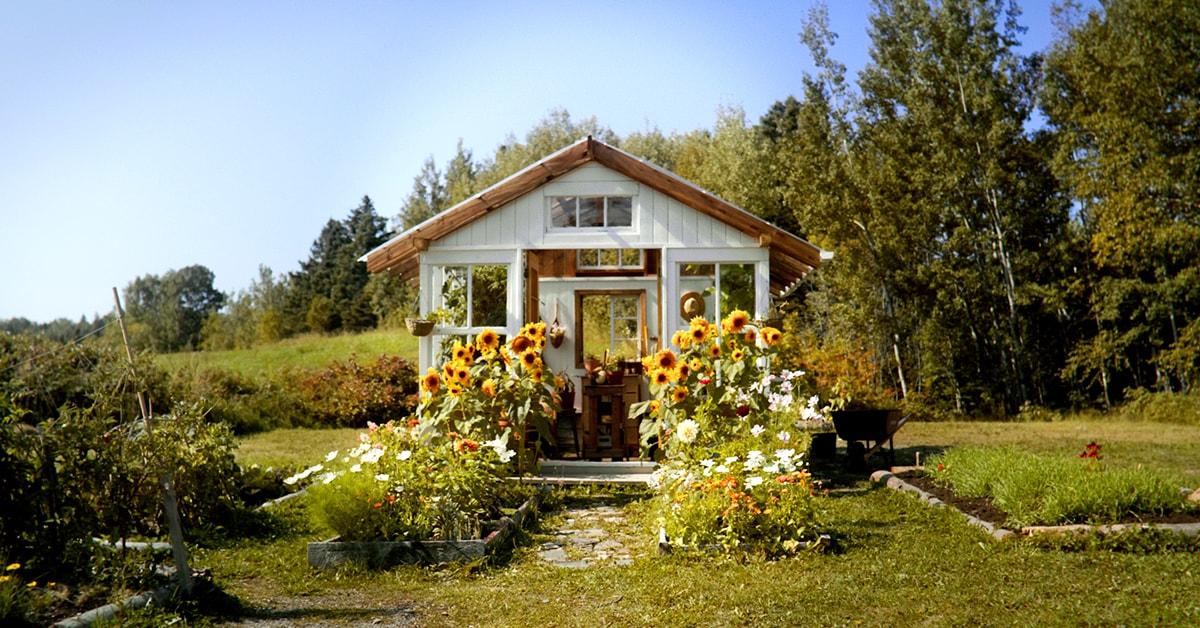
By building a garden greenhouse, you can take full advantage of the sunlight to grow flowers, vegetables, and herbs from March through to late autumn. In addition to creating the perfect climate for plants, a garden greenhouse also protects them from the elements, pests, and diseases. What are you waiting for? Find out how to build your own.

Difficulty level: Pro
Duration: 3-4 days
DOWNLOAD THE PLAN
Caution

Some municipalities prohibit or restrict the construction of garden greenhouses in residential areas, although small-scale artisanal greenhouses are usually permitted. In all cases, refer to your municipal bylaws to find out more about:

  • maximum square footage;
  • maximum height;
  • distances to be respected; and
  • authorized materials.

Make sure you apply for and obtain all the necessary permits before you start. 

Please note that all boards in the enclosed material list must be cedar or treated wood.

Before You Start

Choosing the right materials is very important to ensure durable results. We recommend building your greenhouse with pressure-treated wood (more budget-friendly) or cedar wood (an organic material that weathers beautifully). Do not use pine, as it is not a mould- and fungus-resistant material. As for the sheeting, clear PVC and polycarbonate are both great options that will diffuse the sunlight and give even exposure to your crops.

Before you start, make sure to have all the necessary tools and materials on hand so you can get right at the job.

Be sure to refer to the plan and cutting diagrams regularly. Please note that all measurements are guidelines only, so be sure to measure the space before each cut to avoid wasting wood. Wood is never perfectly straight, so measurements will fluctuate slightly from place to place.

Also note that assembling the greenhouse takes a minimum of 2 people and a stepladder.
DOWNLOAD THE PLAN

1
Choose the Right Location for Your Garden Greenhouse

Before you get started, be sure to choose the right location for your garden greenhouse. Here are some factors to consider when making your choice: 

  • Sunlight: Ideally, the greenhouse should be placed in full sun, or at least in a partially sunny spot.
  • Orientation: We recommend positioning one of the two longer sides of the greenhouse (the front or rear) toward the south, southeast, or southwest, depending on your backyard layout and what’s most convenient for you.
  • Wind: Even if your greenhouse is solidly anchored in its foundation, placing it in a location that’s sheltered from the wind will help keep it in good condition for years to come (e.g., near a south-facing wall or a fence).
  • Accessibility: Make sure you have easy access to a water source and electrical outlet. It’s also a good idea not to place the greenhouse too far from the house, especially if you plan to use it even when there’s snow on the ground.
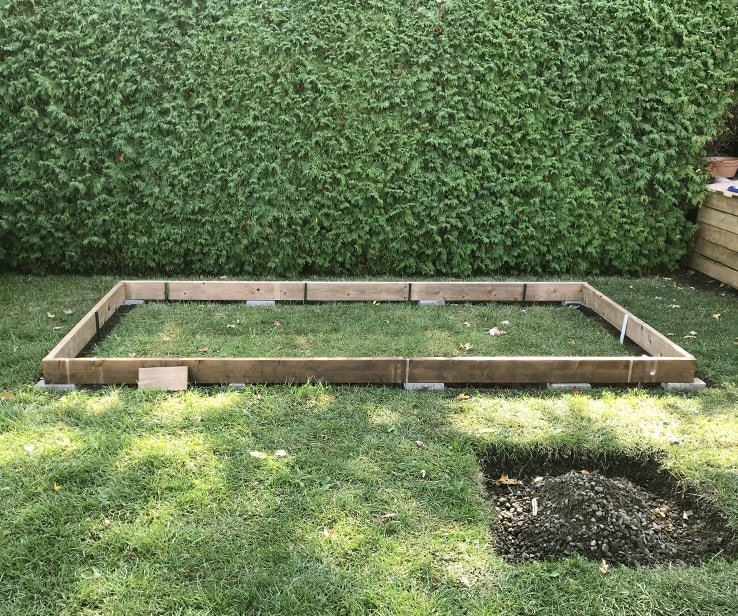
Concrete blocks in a backyard

2
Build the Foundation

  • 2.1Use stakes and rope to mark out the contour.
  • 2.2Place a concrete block (parts A1) in each corner of the greenhouse, under the door jambs, under the door threshold, and every 4’ between each block. Ensure that the blocks are positioned so that the foundation parts rest on the middle of the blocks.
  • 2.3Level the concrete blocks once using a wooden plank and a level.
  • 2.4Following the plan, build the wooden base (parts A2 and A3).
  • 2.5Cut 2x4 scraps at a 45° angle to reinforce the corners (parts A4).
  • 2.6Place the wooden base on the blocks, then level again. If a block is too high, tap it with a rubber mallet or remove some soil. If it’s too low, add some gravel and compact well.
icon-bulb

Pro Tip

Since the door threshold is a few inches off the ground, we recommend placing patio stones in front of the doorway to create a step effect and avoid tripping hazards.

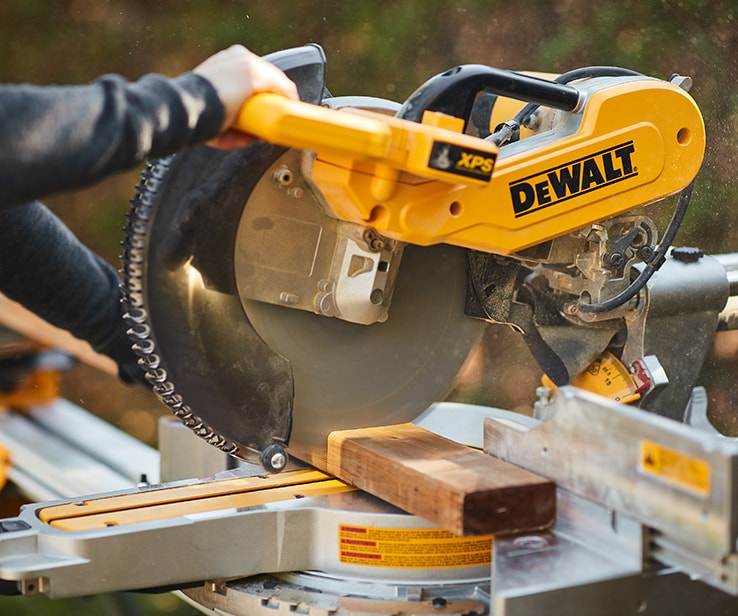
Person using a mitre saw

3
Build the Front Wall

  • 3.1Do not cut the crossbeams at this point.
  • 3.2Place parts B2 and B3 together on their flat/wider side, then join them using screws.
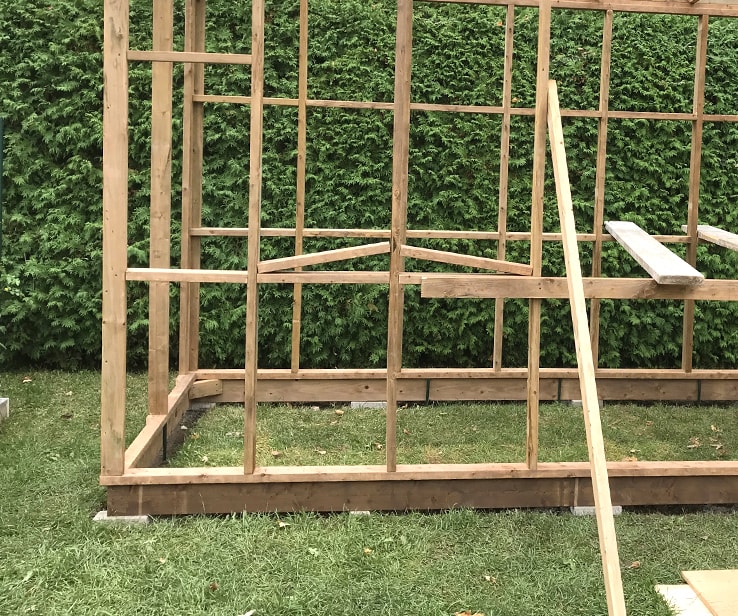
  • 3.3Next, lay the pieces that will make up the front wall structure (parts B1, B2, B3, and B4) on a flat surface and assemble them using treated wood screws, making sure that part B2 is located on the outside of the frame, and part B3 on the inside.
  • 3.4Position the wall so that it’s aligned with the centre of the base (part A3) along its width and length.
  • 3.5Secure to the foundation by adding a treated wood screw approximately every 12".
  • 3.6Fasten the parts B5 to the inside of the uprights (parts B2) close to the door space, screwing from the outside to conceal the screws. These help reinforce the door structure.
  • 3.7Place the lintel (part B6) on top of parts B5, then secure by screwing from above.
  • 3.8Cut 2x4 scraps at a 45° angle to reinforce the top corners (parts B8).
  • 3.9Using a chalk reel (or a sufficiently long plank of wood), draw a discreet line where the crossbeams (parts B7) will be installed.
icon-bulb

Pro Tip

The height of the crossbeams depends on the desired height of the shelves inside the greenhouse. We therefore recommend taking the time to plan the interior layout of your greenhouse before proceeding.

4
Build the Rear Wall

  • 4.1Do not cut the crossbeams at this point.
  • 4.2Place the pieces that will make up the rear wall structure (parts C1 and C2) on a flat surface and assemble them using treated wood screws.
  • 4.3Position the wall so that it’s aligned with the centre of the base (part A3) along its width and length.
  • 4.4Secure to the base by adding a treated wood screw approximately every 12".
  • 4.5Cut 2x4 scraps at a 45° angle to reinforce the top corners (parts C4).
  • 4.6Using a chalk reel (or a sufficiently long plank of wood), draw a discreet line where the crossbeams will be installed.
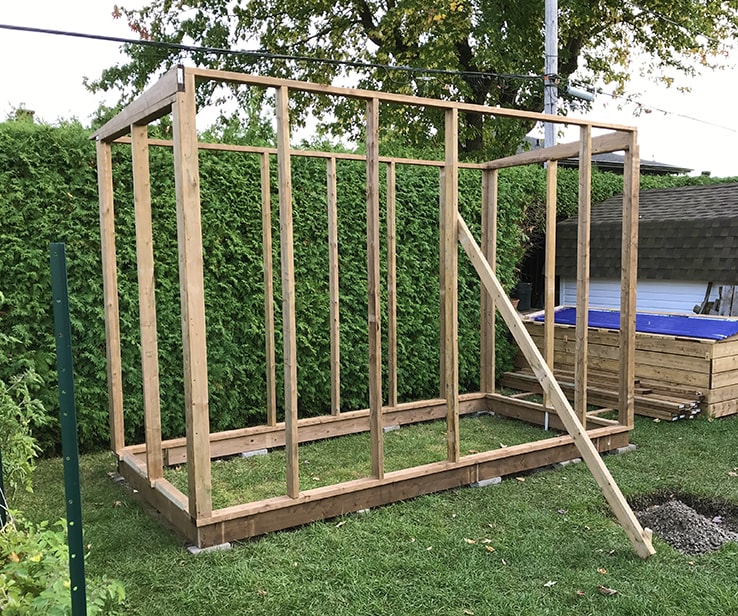
Structure of a wooden backyard greenhouse

5
Build the Side Walls

  • 5.1Slide part D1 between parts C1 and B1, then screw into the base (part A2).
  • 5.2Add the uprights (parts D2): 
    • The part D2 in the rear corner should be placed with the narrow side against part C1. Screw through part C1 to secure part D2.
    • The other 2 parts D2 (centre and front corner), should be placed with the narrow side towards the outside of the greenhouse and screwed at an angle into part D1.
  • 5.3Slide part D3 onto the top of the side wall structure, then screw into the uprights (parts D2) from above.
  • 5.4To cut the parts D4:
    • Mark one end 1" from the edge.
    • Draw a line from this point to the opposite corner of the other end.
    • Clamp the board to a workbench, then cut with a circular saw.
  • 5.5Fasten part D4 in place (remember to leave the thin end of part D4 at the rear protruding by 8"), screwing from below every 12" or so.
  • 5.6Repeat these steps for the second side wall.
  • 5.7If necessary, add screws to securely join the front, rear, and side walls.
  • 5.8Using a table saw, cut a 5/4x6 board in half lengthways to create part D5.
  • 5.9Secure finishing parts D5 and D6 to the outside of the greenhouse using treated wood screws.
  • 5.10Inside the greenhouse:
    • Cut 2x4 scraps at a 45° angle to reinforce the bottom corners (parts D10).
    • Add the window jambs (parts D7), then the top frames (parts D9), rails (parts D8), and reinforcements (parts D10).
Wooden residential greenhouse

6
Add Crossbeams

  • 6.1Measure the space between the uprights at the level of the lines drawn to determine the exact length of the crossbeams (parts B7 and C3), then cut the boards to size.
  • 6.2Measure again before cutting any other pieces.
  • 6.3Fasten the crossbeams (parts B7 and C3) to the uprights (parts B3 and C2), checking regularly that everything is level. Where possible, screw through the uprights; otherwise, screw at an angle.
Wooden greenhouse with a pergola-style roof

7
Build the Roof

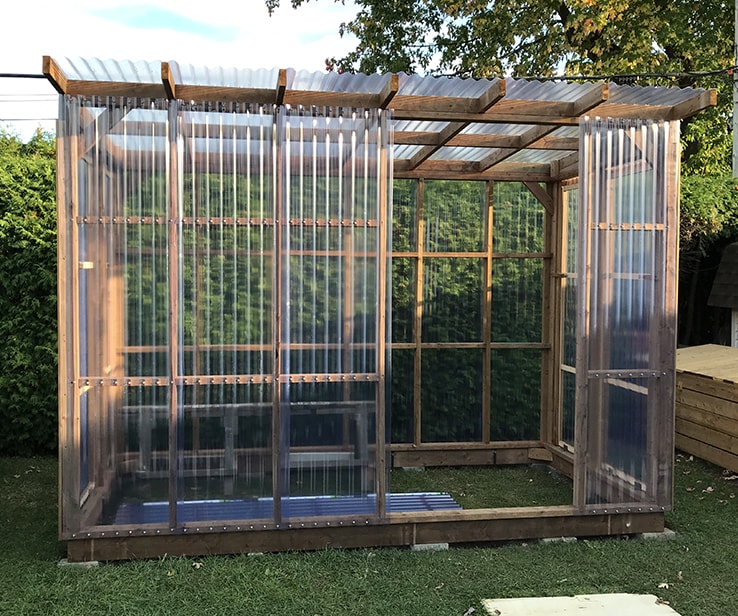
  • 7.1Following the plan, measure and cut the boards that will form the rafters (parts E1).
  • 7.2Screwing at a 45° angle, starting at the ends, attach the 7 rafters (parts E1) to the top beam of the front wall (part B4) and rear wall (part C1). We recommend aligning the crossbeams (parts E1) with the uprights of the front wall (parts B3) and rear wall (parts C2), where possible.
  • 7.3Make sure all parts are square before screwing into place.
  • 7.4Using a chalk reel (or a sufficiently long piece of wood), draw a line where the crossbeams (parts E2) will be installed.
  • 7.5Measure the space between the uprights at the height of the lines marked to find out the exact length of the crossbeams (parts E2), then cut the boards to size.
  • 7.6Measure again before cutting any other pieces.
  • 7.7Fasten the crossbeams (parts E2) to the rafters (parts E1), checking that everything is square. Where possible, screw through the rafters; otherwise, screw at an angle.
  • 7.8Secure the roof by screwing parts E3 to the inside of the side walls.
Greenhouse with open windowsScrap of wood used as a window support

8
Build and Secure the Windows

  • 8.1Assemble the 4 windows according to the plan:
    • Place parts F1 and F2 on a flat surface and assemble them using treated wood screws.
    • Attach the clear panels as explained in step 10.
    • Add 2 square mortise hinges to the base of each window.
  • 8.2To install the windows on the greenhouse:
    • With one person holding the window, attach one of the 2 hinges to the base (part D2), taking care to drive in only one screw.
    • Position the window so that it’s level and square.
    • Secure the other hinge in place.
    • Push in the remaining screws to secure.
  • 8.3Following the plan, add the screw eyes and chains, as well as the gate hook and ring sets.
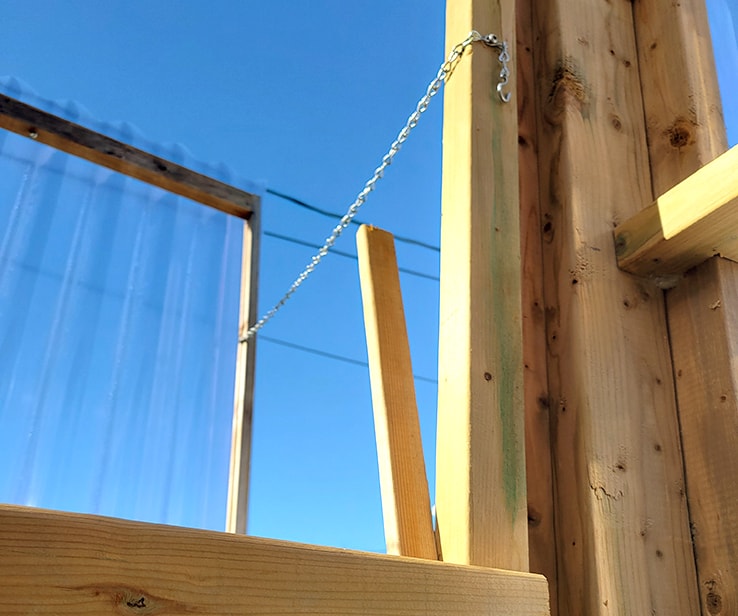
  • 8.4To create anti-slam supports (parts D12):
    • Cut 4 2x2 scraps to the same length as the chains (we opted for a length of 16”).
    • Screw one end of the strip under the upper part D10, on the corner side of the greenhouse (see diagram 2), without pushing the screw all the way in. This looseness allows the supports to be rotated.
  • 8.5Cut the PVC moulding (parts D7). This part will prevent water from entering the greenhouse from the sides. You can also use a 2x2 treated wood board.
  • 8.6On the outside, fasten the moulding (part D7) above the windows.
DIY greenhouse with PVC panels

9
Install the Clear Panels

  • 9.1Using a table saw, cut PVC panels to size, as required (e.g., for windows).
  • 9.2Using a permanent marker, mark all screw locations directly on the panels—in each corrugation "hollow”—at the height of each horizontal wood board (i.e., the top and bottom beams, as well as the crossbeams).
  • 9.3Pre-drill each hole with a bit slightly larger than the hexagon-head screws. This looseness will prevent the plastic from cracking as the wood expands and contracts.
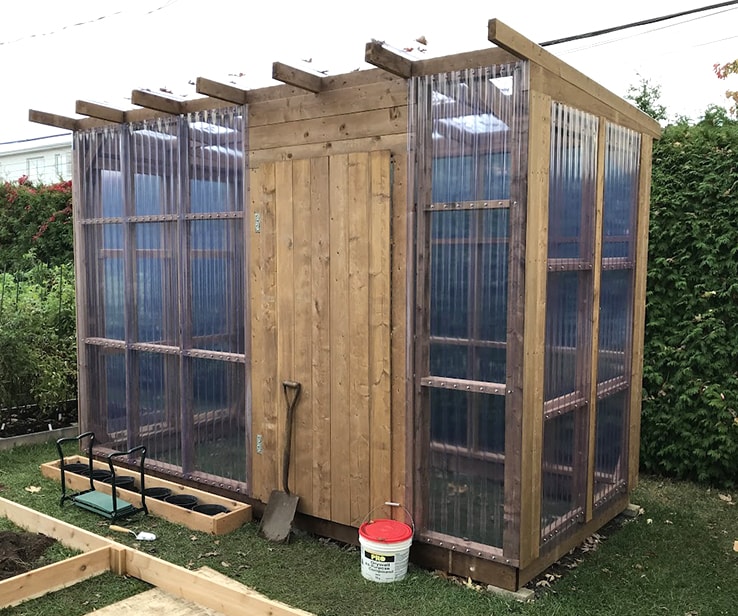
  • 9.4Following the plan, screw the panels onto the front (don’t forget to leave space for the door!) and rear walls, then onto the roof, taking care to overlap the panels slightly (one wave) so that water doesn’t enter the greenhouse when it rains.
DIY garden greenhouseLock on a wooden support

10
Build the Door and Its Structure

  • 10.1Using a table saw, cut an 8’ 5/4x6 board in half lengthwise to create finishing board B9b.
  • 10.2Screw finishing boards (parts B9a, B9b, and B10) in place.
  • 10.3To create part B11 (using a scrap from parts B9):
    • Measure the bottom of the doorframe.
    • Cut a 5/4x6 scrap wood piece or board to this length (approx. 34”).
    • Using a table saw, cut the board lengthwise to a width of 1 ½".
  • 10.4Fasten part B11 to part B1 to align it with the B10 finishing boards.
  • 10.5To assemble the door:
    • Place the parts G1 side by side on a flat surface, as close together as possible.
    • Place the parts G2 perpendicular to the parts G1, 10" from the top and bottom, then secure in place using at least 2 screws per board.
    • Use a pencil and a piece of wood to mark the corners of part G4.
    • Clamp the board to a workbench, then cut with a circular saw.
    • Screw parts G3 and G4 in place to further solidify the door.
    • Install the hinges on parts G3.
  • 10.6Use scraps of 5/4x6 boards to create reinforcements (parts B12).
  • 10.7Screw the reinforcements (parts B12) onto the finishing boards (parts B10).
  • 10.8To attach the door to the frame:
    • Align the door with the frame.
    • Attach the upper hinge to the associated reinforcement (part B12), taking care to drive in one screw only.
    • Position the door so that it’s level and square.
    • Attach the bottom hinge to the associated reinforcement (part B12).
    • Push in the remaining screws to secure.
  • 10.9Secure the handle and locks in place.
icon-bulb

Pro Tip

Barrel, hinge, or hook bolts can be used to lock the greenhouse door. If you plan to use the greenhouse during the colder seasons, we recommend using a hook lock, as other types may be difficult to open due to the expansion and contraction of the wood.

Trellis in a garden greenhouseDIY greenhouse filled with vegetable plants

11
Set Up the Greenhouse Interior

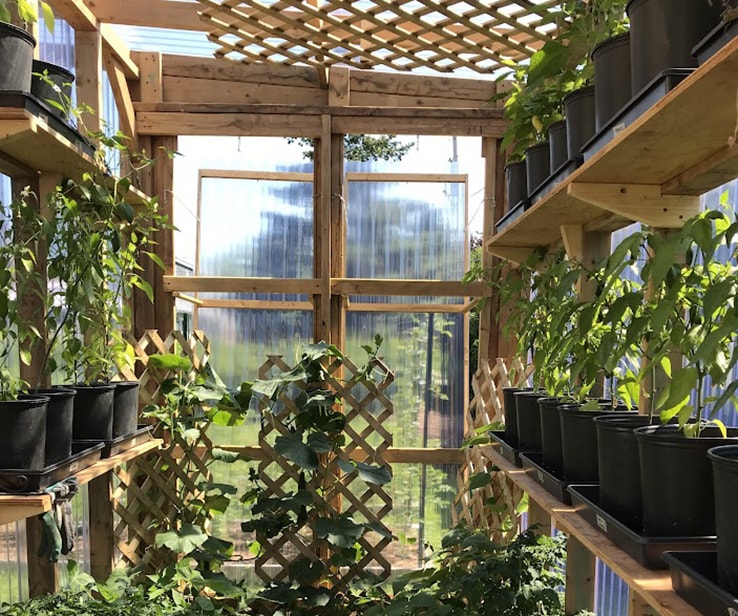
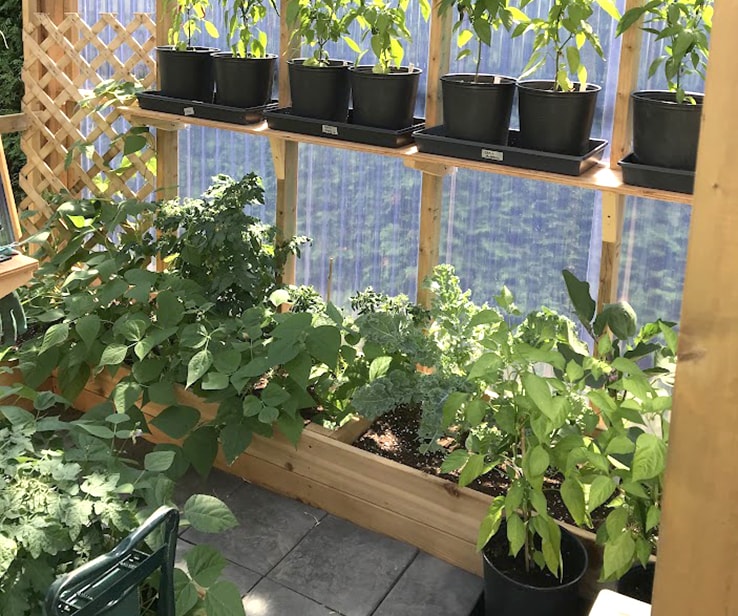
  • 11.1Furnish the interior as needed: think shelves (a good way to use up your cedar and treated wood scraps!), trellis, planters, hanging baskets, a work table, storage for gardening tools, and more.
  • 11.2To keep the area clean and to prevent small animals from burrowing into the greenhouse, place a geotextile membrane and patio tiles over the entire floor surface, as close to the walls as possible. If you plan to install raised planters inside the greenhouse, do not place patio tiles under them.
icon-bulb

Pro Tip

Bear in mind that if you install a lot of trellis on the walls or ceiling, your climbing plants will be delighted, but they could overshadow the other plants in the greenhouse.

Woman watering plants

Use Your Garden Greenhouse Like a Pro!

You did it—good job! Now, a garden greenhouse is key to creating an ideal, controlled environment for your plants. However, you need to use it properly, perform regular maintenance, and add some controls of your own if you want to keep the temperature and moisture as steady as possible so your crops can thrive.

Read our complete guide to learn how to use a garden greenhouse.

Disclaimer

These DIY projects are provided for informational purposes only. The information contained in RONA’s DIYs is intended to provide general guidelines to simplify jobs around the house. Because tools, products, materials, techniques, building codes, and local regulations are continually changing, RONA inc. assumes no responsibility for the accuracy of the information contained herein and disclaims any liability for the omissions, errors, or outcome of any project. RONA inc. makes no representation on the feasibility of any project and the viewer bears all risks coming with the realization of the projects. It is the responsibility of the viewer to ensure compliance with all applicable laws, rules, codes, and regulations for a project. The viewer must always take proper safety precautions and exercise caution when taking on any project. If there is any doubt in regard to any element of a project, please consult a licensed professional. 

Suggested Products

SHOP SMALL GARDENING TOOLS