Published on November 24, 2023
How to Refinish Hardwood Floors
Hardwood floor refinishing is an affordable way to spruce up a space without a full floor replacement. Follow our guide to learn if this DIY project is for you. We’ve got a list of necessary tools and materials, step-by-step instructions, and pro tips to get your hardwood flooring looking good as new.
1Prep the Room
- 1.1Clear the room of furniture, drapes, pictures, and register covers.
- 1.2Remove the doors.
- 1.3Label the baseboard and shoe moulding using painter’s tape to mark corresponding pieces and walls with a numbered or lettered system—a 1 on the moulding, a 1 on the wall, and so forth. Then, remove the labelled moulding with a pry bar.
- 1.4Inspect the floor closely. Drive in all nail heads and remove any carpet staples or fasteners from former flooring (fasteners tear the paper on floor sanders).
- 1.5Cover the vents, light fixtures, and doorways with plastic, then tape thoroughly around the edges.
Safety First!
Wear goggles, gloves, knee pads, hearing protection, and a respirator or dust mask throughout this project.
Important
2Sand the Floor (Coarse Grit)
- 2.1Load the sanders with 30-40 grit sandpaper. Beginning in the farthest corner from the door, sand along the grain, one row at a time. Make sure to move as soon as you start the sander to avoid damaging the flooring.
- 2.2At the end of the room, move over and pull back, slightly overlapping the first pass by a few inches.
- 2.3Continue sanding, getting as close to the edges as possible.
- 2.4After sanding the room’s centre, sand the edges using a power hand sander loaded with 30-40 grit sandpaper.
- 2.5In the corners, use a detail sander also loaded with 30-40 grit sandpaper.
- 2.6Once the first pass of sanding is complete, vacuum thoroughly with a brush attachment.
- 2.7Examine the floor. Fill any gouges or holes with matching wood filler.
Pro Tip
Do not let the bag fill more than halfway before emptying. Otherwise, the additional weight of the dust negatively affects the sanding of the floor. Plus, the bag will be lighter and easier to handle.
3Sand the Floor (Medium Grit)
- 3.1To help keep track of your sanding with the second pass, make light pencil marks along the edges of the room. You’ll see where you’ve sanded as you sand away the marks.
- 3.2Load the sanders with medium, 50-60 grit sandpaper.
- 3.3Follow the same process and pattern as the first pass. Use the orbital sander in the room's centre, the hand sander along the edges, and the detail sander in the corners.
- 3.4Thoroughly vacuum the room with a brush attachment.
4Sand the Floor (Fine Grit)
- 4.1Load the sanders with a fine 80-100 grit sandpaper. The fine texture creates a smooth surface.
- 4.2Follow the same process and pattern as the first and second pass, using the hand sander around the edges and the detail sander in the corners.
- 4.3Vacuum thoroughly using a brush attachment and damp mop to pick up any remaining particles on the floor. Use a damp rag to wipe away excess dust from windows, sills, and other structural edges around the room.
5Polish the Floor (Optional)
- 5.1If the floor feels rough after sanding with the 100-grit paper, buff it with a 120-grit screen. Buffing with a screen helps smooth out fine scratches. Follow the same pattern as sanding, working along the grain and getting as close to the wall as possible.
- 5.2Use a sanding screen on an extension pole for the room's edges and corners.
6Deep Clean the Floor
- 6.1Vacuum and wipe away excess dust from walls, windowsills, fans, and other fixtures.
- 6.2Wipe the floor with a cloth dampened with mineral spirits.

7Add the Finishing Touches
Staining
Staining the floor is only necessary if you want to change the floor colour. To do so, apply a pre-stain conditioner and stain according to the manufacturer’s instructions. Begin staining at the farthest corner from the door and work toward the exit to avoid staining yourself into a corner of the room.
Sealer
If you’re not staining the floor, apply a sanding sealer starting in the farthest corner of the room. Let it dry according to the manufacturer’s instructions, then lightly sand with 320-grit sandpaper. Vacuum the entire room again and clean the floor with a tack cloth.
Clear Polyurethane
Polyurethane has a strong odour, so make sure to open doors and windows for ventilation throughout your home. Some polyurethane adds an amber tone to wood. Check the label before buying and application to ensure your desired colour and sheen.
- Stir the polyurethane thoroughly. Do not shake the can as this may cause bubbles.
- Remove excess fibres from the stain applicator with tape. Likewise, remove any loose bristles from your natural-bristle brush.
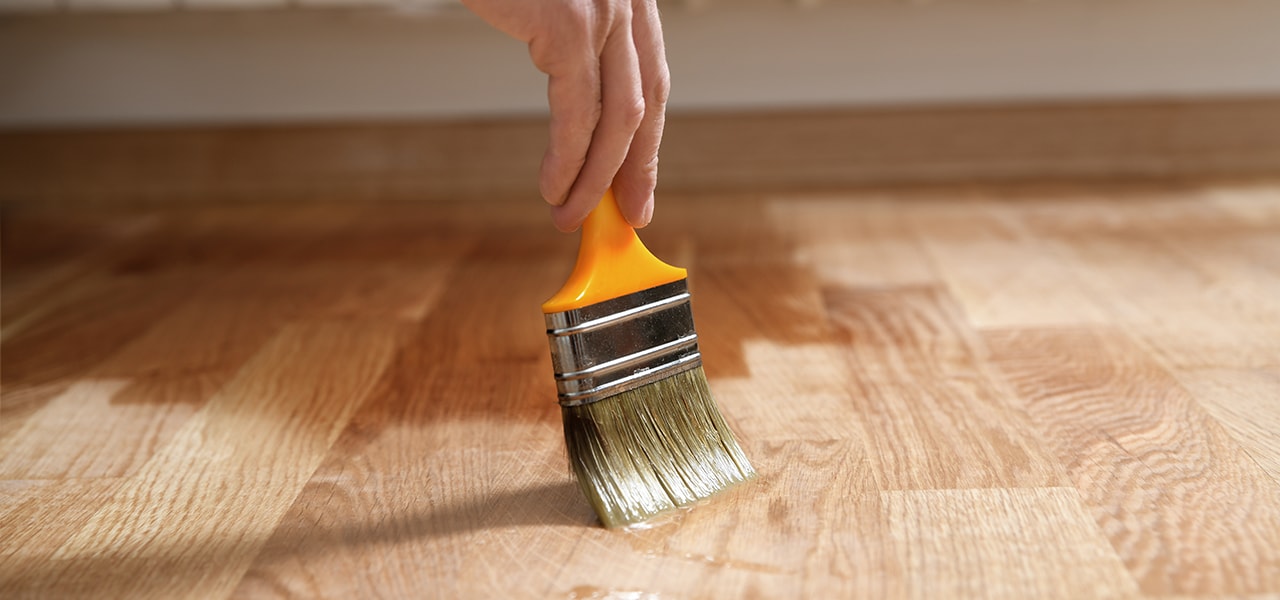
- Using smooth strokes, apply the polyurethane starting at the edge of the room, with the natural-bristle brush, in the farthest corner from the door. Maintain a wet edge and move slowly and deliberately to avoid creating bubbles in the polyurethane.
- Use the stain applicator as you move toward the centre of the room. With each pass, overlap your strokes slightly to feather the starts and stops together for a more uniform coat.
- Let the polyurethane dry according to the manufacturer’s instructions, and then apply a second coat. Note that some products require sanding between coats. Refer to your product’s instructions for application.
- Let the second coat dry for a few days, per the product’s labelled instructions, then check the tackiness of the floor. If the floor is sticky to the touch, allow more drying time.
- Wearing soft, flat shoes that won’t damage your new floor, reattach the baseboards, shoe mouldings, and transitions you removed during the refinishing process.
- Replace your furniture, but do not slide anything across the floor to avoid re-scratching the surface.
Pro Tip
Applying felt pads to furniture and table legs helps prevent future scratching and scuffing.
Disclaimer
These DIY projects are provided for informational purposes only. The information contained in RONA’s DIYs is intended to provide general guidelines to simplify jobs around the house. Because tools, products, materials, techniques, building codes, and local regulations are continually changing, RONA inc. assumes no responsibility for the accuracy of the information contained herein and disclaims any liability for the omissions, errors, or outcome of any project. RONA inc. makes no representation on the feasibility of any project and the viewer bears all risks coming with the realization of the projects. It is the responsibility of the viewer to ensure compliance with all applicable laws, rules, codes, and regulations for a project. The viewer must always take proper safety precautions and exercise caution when taking on any project. If there is any doubt in regard to any element of a project, please consult a licensed professional.


