Share
Person painting wooden kitchen cabinets white
Do it yourself

How to Paint Kitchen Cabinets

You don’t need to replace your old kitchen cabinets to give them a fresh new look. A new coat of paint is a quick, easy, and affordable option for both wood and laminate cabinets.

Difficulty level: Intermediate
Duration: 1 week
Before You Start
It can take several days to paint cabinets, so plan your schedule accordingly. Make sure you wear all of the necessary safety gear and keep the windows open for good ventilation. It is also a good idea to remove doors and drawers and paint them in the garage or basement for best results.

Cabinet crown moulding is a great way to refinish cabinet doors. The contrasting finish or colour is also an inexpensive and easy way to update the whole kitchen. Keep these safety tips in mind while you work:

  • Only apply finishing products in a well-ventilated area.
  • Always wear chemical gloves and safety glasses to protect yourself from the product.


CAUTION: If your house was built before 1978 and the cabinets were previously painted, the paint may be lead-based. Call a professional or use a testing kit to find out.
Person removing kitchen drawers
Person removing kitchen cabinet doors
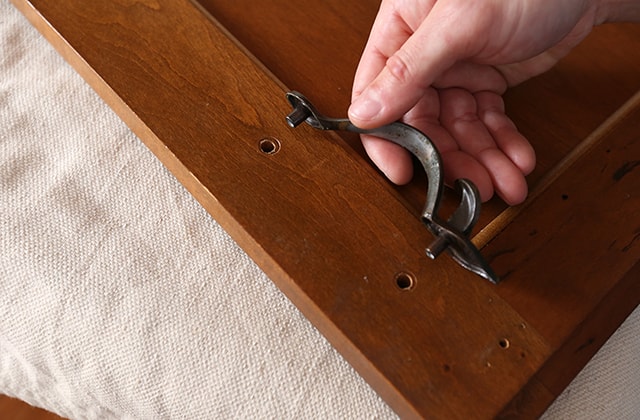
Person removing cabinet hardware
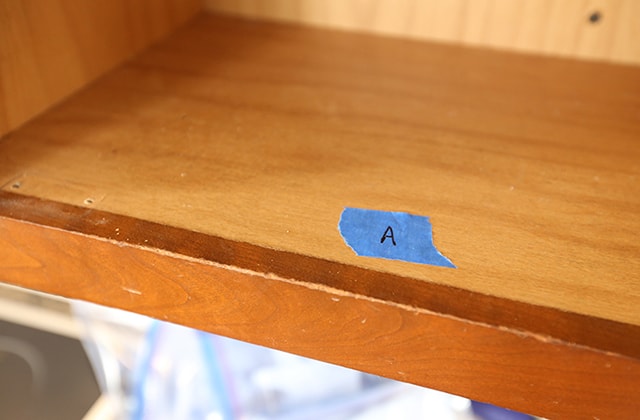
Labelled kitchen cabinets
Labelled kitchen cabinet locations
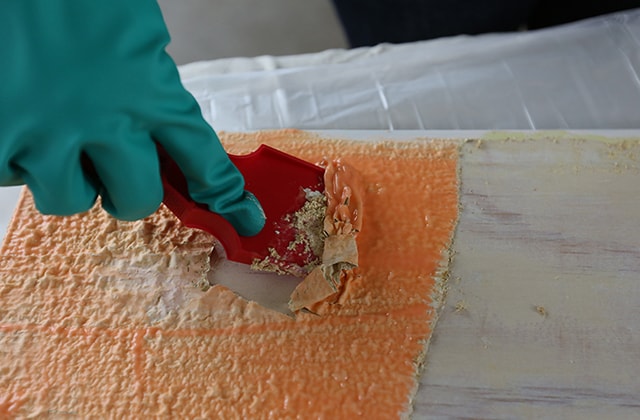
Person stripping paint on kitchen cabinets
1

Get Ready to Paint Your Kitchen Cabinets

  • 1.1 - Pick up the right supplies for your cabinet type: laminate or solid wood. Wood cabinets are easy because you can simply scuff the surface with sandpaper and paint. For laminate cabinets, you need to use a bonded primer first. The laminate should also be in good condition to ensure good results. The label on paint cans will let you know what surface it is for.
  • 1.2 - Use high-quality paint to ensure an attractive finish. Some paints are made to look very smooth, but any premium quality paint is a great choice. Acrylic latex-based paints are a particularly good option as they are easy to clean and very durable. Just ensure that it is acrylic and not vinyl. For latex paint, always follow the cure time directions.

    Use the SICO Colour Selector to easily buy your paint online!
  • 1.3 - Ascertain the condition of the old paint. If it is still in good condition, then you can simply paint over it. If not, then you have to remove it. To do this, apply a stripping product with a paint brush. Once it reacts with the paint, peel it away using a plastic scraper. Allow the surface to dry, then remove the rest with sandpaper.
  • 1.4 - Remove everything from the cabinets. You will be creating dust by sanding later.
  • 1.5 - Remove the cabinet hardware, doors, and drawers, labelling where they go with painter’s tape for when you reinstall them. Keep the hardware in a plastic bag or cup so that you don’t lose any of it.

Pro Tip

A finish with a high sheen will more easily show dings and mistakes, so a satin or semi-gloss finish is typically preferred in the kitchen. Flat paints are less common because they can be hard to clean but look at the instructions for details.

If you don’t have refinishing experience, start with an area that isn’t very visible. Make sure you also keep the countertops, floors, and appliances covered while you work.
Person cleaning kitchen cabinet frames
2

Clean All Cabinet Surfaces

  • 2.1 - Use TSP cleaner to scrub down all of the cabinet surfaces. Grease, grime, heat, and water will have taken their toll, but a good cleaning will have your cabinets freshened right up.
Person using a putty knife
3

Repair Any Damages

  • 3.1 - Use wood filler to fill up dents and holes, and smooth it out with a putty knife.
  • 3.2 - Allow it to dry for as long as instructed.
  • 3.3 - If new hardware is to be installed, fill in the old hardware holes while making sure not to fill any hardware holes that will be used again.
4

Protect the Space

  • 4.1 - Make sure that areas you want to protect, like appliances and countertops, are covered.
  • 4.2 - Use painter’s tape along the cabinet edges as well.
Person sanding kitchen cabinet frames
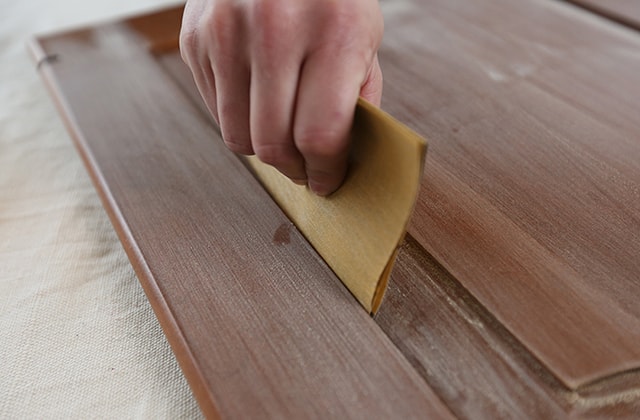
Person using a folded piece of sandpaper
5

Sand All Frames, Drawers, and Cabinets

  • 5.1 - Sand all surfaces with medium-grit sandpaper (100-150) to help the paint stick.
  • 5.2 - For detailing hard-to-reach areas on doors, drawers, and in the frame corners, fold the sandpaper.
  • 5.3 - Clean every surface with a tack cloth and a vacuum to ensure that everything is free of dust before you start painting.

Pro Tip

When using laminate paint, you’ll also have to use a special bonding primer. Some primers will require you to sand first, and just a light once-over will be enough. Sanding too deep can cause damage.
Person applying primer
Person applying primer onto cabinet frames
Person applying primer inside kitchen cabinets
Person priming kitchen drawers
Primed kitchen cabinet doors with labels
6

Apply the Primer

  • 6.1 - Begin with the cabinet frames:

    • Paint from the inside out, starting at the back and moving to the front.
    • Get into the corners and other detailed areas using a brush.
    • Move the brush in even strokes and always finish into the wet primer.
    • For the large and flat areas, use a mini roller.
  • 6.2 - Paint the cabinet doors and drawers:

    • Remove the painter’s tape but keep it somewhere close.
    • Apply a smooth and even coat to the backside, allow it to dry, then flip the door or drawer over and paint the inside or front.
    • Begin in the detailed areas and feather the edges out, checking that the primer isn’t pooling in the corners.
    • For large, flat surfaces, use a roller.
  • 6.3 - Don’t worry, the primer doesn’t have to go on perfectly—it just needs to create a good base for the finishing paint.
  • 6.4 - As you work, tackle one area at a time. Once you are done with a surface, use a dry roller or brush and go over the surface lightly to remove excess buildup. This is known as “laying off.”
  • 6.5 - Follow the directions for how long the primer should dry, which is usually only a few hours.

Pro Tip

Always follow the primer directions—some may recommend sanding before you paint.
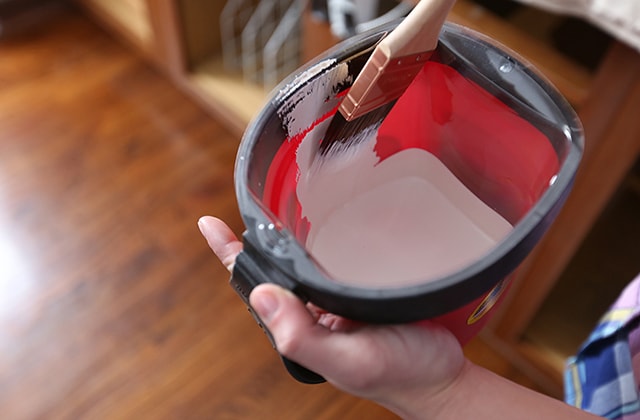
Small bucket filled with white paint
Person painting cabinet frames white
Person painting kitchen cabinet frames
Person painting cabinet doors white
7

Paint the Kitchen Cabinets

  • 7.1 - Starting with the frames, use a foam roller to paint the larger areas and a high-quality brush to paint smaller areas. As with the primer, use even strokes, finishing into the wet paint, and feather the edges. After painting, remember to “lay off” as well.
  • 7.2 - Paint the backs of the drawer fronts and doors, let dry, and paint the fronts.
  • 7.3 - Don’t rush the drying and curing process—follow the paint directions.
  • 7.4 - Apply the second and final coat.
  • 7.5 - Wait for the paint to fully dry before putting the cabinets back together.

Pro Tip

You’ll have an easier time painting edges if you use a painting tripod to lift the doors and drawers above the painting surface. You may want to consider painting only the front of the drawer, as painting the bottom and the sides might cause it to stick to the frames. If you have the experience, then you can use a sprayer.

Some painters recommend applying a top protective coat of polyurethane but a fully cured high-quality paint will provide a durable and hard finish.
8

Freshen Up the Hardware

  • 8.1 - Clean the hardware with dish soap and warm water, patting dry.
  • 8.2 - Use fine-grade steel wool to lightly scuff the hardware.
  • 8.3 - Attach the knobs and handles to some upright cardboard to make it easier to work.
  • 8.4 - Spray the appropriate primer directly on the hardware and let it dry. Then, apply a coat of paint. Keep the coats light to prevent buildup.

Pro Tip

Speed up the process by working on different hardware between coats.
9

Add the Finishing Touches

  • 9.1 - Add shelf liners to your cabinets for a decorative touch or extra protection. Some come with a sticky backing while others are padded.
  • 9.2 - Reassemble the hardware and cabinets.
  • 9.3 - Put the drawers and doors back into their correct places with the help of their labels.

Pro Tip

For new hardware that needs new holes to be drilled, use a hardware jig to align all of the holes correctly.

Disclaimer

These DIY projects are provided for informational purposes only. The information contained in RONA’s DIYs is intended to provide general guidelines to simplify jobs around the house. Because tools, products, materials, techniques, building codes, and local regulations are continually changing, RONA inc. assumes no responsibility for the accuracy of the information contained herein and disclaims any liability for the omissions, errors, or outcome of any project. RONA inc. makes no representation on the feasibility of any project and the viewer bears all risks coming with the realization of the projects. It is the responsibility of the viewer to ensure compliance with all applicable laws, rules, codes, and regulations for a project. The viewer must always take proper safety precautions and exercise caution when taking on any project. If there is any doubt in regard to any element of a project, please consult a licensed professional. 

Suggested products

SHOP PULLS AND KNOBS