Share
Do it yourself

Install hardwood flooring

Opt for timeless beauty, durability and environmental sustainability. A beautiful, well-maintained hardwood floor lends elegance, character and value to a home's interior. Its durability, warmth and timeless charm make hardwood a popular flooring. You’ll never regret it. Bonus? You can do it yourself!

1

Prep the subfloor

  • 1.1 - Make sure that the subfloor is either ¾"plywood or OSB particle board. If the subfloor consists of only one layer of plywood, it is advisable to add a second layer, ¼" to ½" thick.
  • 1.2 - Ensure the subfloor is even and level. Variations up to 3/16" per 10' are acceptable.
  • 1.3 - Secure the subfloor to the floor joists to prevent the floor from shifting or creaking.
  • 1.4 - Determine your layout. Unless the subfloor has been reinforced, boards should be installed perpendicular to the joists underneath or at a 45° angle.
  • 1.5 - Calculate the total surface area to be covered and allow for an additional 10% for waste.
  • 1.6 - Open boxes to ensure boards are uniform.
  • 1.7 - Leave the wood to acclimate in the room where it will be installed for several days prior to installation.
  • 1.8 - Remove all edgings, baseboards and quarter-rounds, as well as door thresholds.
  • 1.9 - Make cuts at the bottom of door frames to allow you to insert the boards.
  • 1.10 - Clean and vacuum the floor regularly as you work.
  • 1.11 - Cover the entire surface with a vapor barrier underlayment to smooth out small irregularities in the sub-floor, block moisture from collecting and to help soundproof the floor.
  • 1.12 - Roll out the underlayment parallel to the floor joists.
  • 1.13 - Allow a 6" overlap and staple every 8" to 10".

Pro Tip

Start the installation along the longest wall, usually the hallway.
2

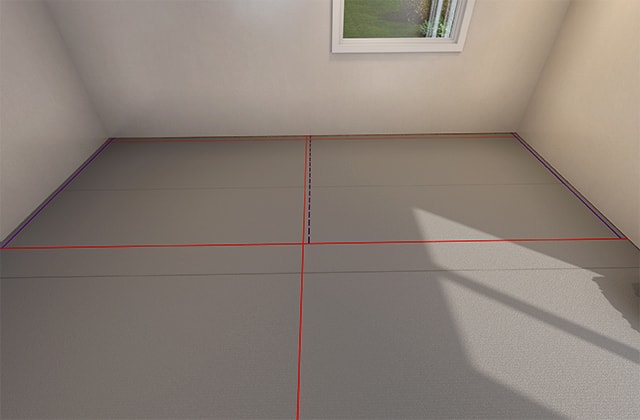
Mark guide lines

  • 2.1 - Determine your starting point and layout plan for your floor boards.
  • 2.2 - Measure the width of the room and determine the width of the last board. If the width is less than the required minimum, reduce the width of the first row.
  • 2.3 - Mark the center along each wall.
  • 2.4 - Stretch a line to create a reference line between each point to form a cross in the middle of the room.
  • 2.5 - Mark the expansion width on the line, generally ½" to ¾" out from the wall where you’ll begin installation.
  • 2.6 - Calculate the distance between the center and this point.
  • 2.7 - Transfer this measurement from the center line along the walls.
  • 2.8 - Draw a line parallel to the starting wall and the same distance from it, corresponding to the previous measurement.

Pro Tip

Test the floor nailer on a few boards and adjust the pressure according to the species of wood you’re installing.
3

Install the first row

  • 3.1 - Determine the boards that will be used for the first four or five rows and lay them out.
  • 3.2 - Use the straightest, longest boards for the first row.
  • 3.3 - Align the first board with the guideline, with the groove facing the wall and the tongue facing into the room.
  • 3.4 - Use spacer blocks or shims to maintain a ¾" expansion gap.
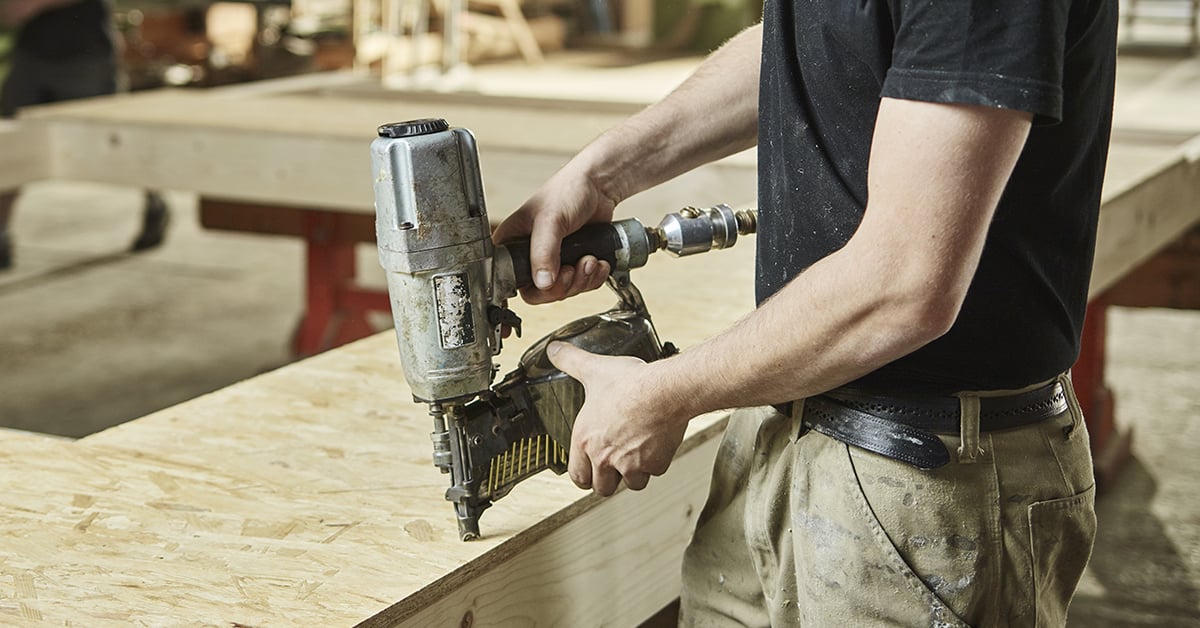
  • 3.5 - Nail in the first board ½" from the grooved edge using a pneumatic nailer. If you choose to nail by hand, bore 1/16" pilot holes in the planks at a 45° angle, and countersink all nails.
  • 3.6 - Start nailing approximately 2" from the end of the boards and space the holes every 6".
  • 3.7 - Measure the length of the second board, maintaining the expansion gap at the end.
  • 3.8 - Use a mitre saw for cuts facing the wall.
  • 3.9 - Seat the end tongue into the groove of the first board and fit the two boards together for a tight seam. Align with the guideline and maintain the expansion gap along the wall. Nail in ½" from the edge.
  • 3.10 - Nail in the first row through the tongue and sink the nails.
4

Install the next rows

  • 4.1 - Avoid starting or finishing a row with board lengths of less than 12".
  • 4.2 - Begin the following row with a cutting remnant.
  • 4.3 - Insert the tongue into the groove.
  • 4.4 - Use a block and mallet for adjustments to ensure a good fit.
  • 4.5 - Stagger board joints by 6" to 8" from one row to the next, alternating board lengths.
  • 4.6 - Nail in tongues, spacing nails 6" apart. Use a pneumatic nailer. After a few rows, switch to a floor nailer.
  • 4.7 - Measure the distance between the wall and the last board when installing the last row. Subtract the expansion gap.
  • 4.8 - Use a table saw to cut your boards to ensure a straight cut.
  • 4.9 - Use a lever and wedge to protect the wall if necessary. Insert the board.
  • 4.10 - Cut the boards lengthwise only if the last row is less than 1" wide. Apply glue to the groove before installing.
  • 4.11 - Nail in the last row either by hand with a hammer or with pneumatic nailer.

The final touch

Your hardwood floor would not be complete without elegant baseboard trim.

Read our Install baseboards article for all the details of this project.

Suggested products

See all hardwood flooring