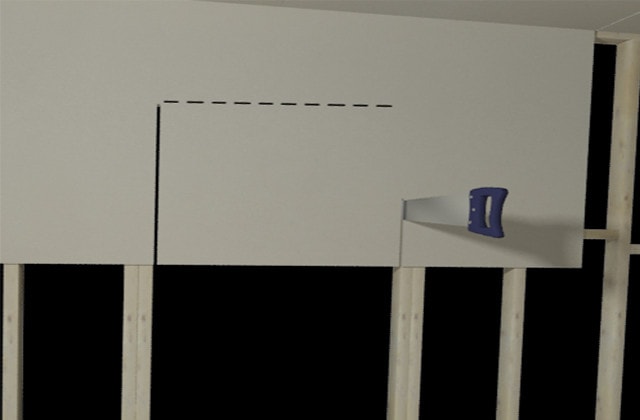
Install drywall panels

Installing drywall on the ceiling and walls is an important step towards finishing a room, and hanging 1/2" or 5/8" drywall is a project most DIYers are willing to take on. You’ll need a few tools, and an extra pair of hands will make all the difference. The following is a list of helpful installation tips and supplies you will need when building an interior wall.

Screws

For the best results, screws are preferable to nails. Use a dimpler on the drill so you don't drive screws in too deep.
  • Wood studs – coarse thread drywall screws
  • Steel studs – fine thread drywall screws
  • ½" Drywall – 1 5/8" screws
  • 5/8” Drywall – 2" screws
  • Walls – space screws 16" apart
  • Ceiling – space screws 12" apart

Installation

If you're installing drywall on concrete – in the basement for example – you'll need strapping or furring on the walls to provide a structure to hang the sheets of drywall. Install adequate insulation and a construction-grade vapour seal before closing the wall.

Build T-Supports to help you install drywall panels on the ceiling. On an 8' piece of wood, nail another piece of wood perpendicularly to form a "T" (like a telephone pole). You can use this to maintain ceiling panels in position while you screw them in. You can also rent a drywall lift to simplify the job.
Measure the walls and ceilings to find how much drywall is needed
1

Estimate quantities of materials

  • 1.1 - Take horizontal and vertical measurements of each wall and ceiling area to cover.
  • 1.2 - Calculate the surface area of each surface to cover (walls and ceiling), then add to obtain the total surface area.
  • 1.3 - Divide this number by the area of the drywall panel size you selected (32 sq. ft. for a 4' x 8' panel and 48 sq. ft. for a 4' x 12' panel). The result provides you with the number of drywall panels you will need.
  • 1.4 - Always add 5% to cover loss and waste
  • 1.5 - You will need approximately 100 screws per 100 sq. ft.
Calculator - Drywall
To make a square cut use a t-square as a guide.
2

Cut the drywall panels

  • 2.1 - Measure and mark the location of the cutting lines on the edges of the drywall sheet.
  • 2.2 - Press the drywall panel against the wall, facing out.
  • 2.3 - Place a T-Square on the line and score with a drywall knife (cutting the paper on the face side through to the gypsum core).
  • 2.4 - Lean the scored line over a 2" x 4" and apply pressure to the panel so that it breaks cleanly along the joint.
  • 2.5 - Score the paper on the back of the drywall sheet to complete the cut.
  • 2.6 - Smooth all edges with a drywall rasp.
Hang drywall on the ceiling with a brace.
3

Install the ceiling panels

  • 3.1 - Check that the joists are straight and level. If not, nail in perpendicular furring, spacing nails 16" apart. Shim where necessary.
  • 3.2 - Measure the ceiling and locate the joists on the perimeter.
  • 3.3 - Leave uncovered ¼" of the studs starting in a corner.
  • 3.4 - Apply construction adhesive to the joists above the first panel.
  • 3.5 - Lift the panel and maintain in position with either a T-Support or a drywall lift.
  • 3.6 - Begin with the centre and screw in the panel at 12" intervals.
  • 3.7 - Do not screw in closer than 3/8" to ½" from the edge.
  • 3.8 - Position subsequent panels to ensure joints don't align.
  • 3.9 - Complete the ceiling installation before starting the walls.
Hang drywall tight to the ceiling
4

Install the wall panels

  • 4.1 - Mark the location of the studs directly on the floor below. Measure the wall and determine the position of the drywall sheets on the studs.
  • 4.2 - Leave ¼" clear from the corner and lap over the stud by approximately ¾". If necessary, add a 2" x 4" to the corner structure to ensure sufficient backing to nail into.
  • 4.3 - Install panels horizontally to reduce the number of joints.
  • 4.4 - Start with the upper corner and screw in the panel at 16" intervals.
  • 4.5 - Do not screw in closer than 3/8" to ½" from the edge.
  • 4.6 - Position the other panels so that joints do not align. Ensure there are no joints within 12" from a window or door opening.
  • 4.7 - Leave a ½" space between the bottom panel and the floor. Use a drywall lever to help.
  • 4.8 - Cut the panels for the exterior corners slightly too long so that they overlap the corners.
5

Cut the openings for the light fixtures, electrical outlets and switches

  • Technique using a rotary tool or drywall cut-out tool
  • Openings are made after the drywall panels have been installed. You can use the outside edge of the metal electrical boxes as a cutting guide. Remember: turn off the power to the electrical boxes.
  • 5.1 - Make sure the casing is solid.
  • 5.2 - Push back all the wires around the opening and clear any obstructions from the outer edge.
  • 5.3 - Install the drywall panel.
  • 5.4 - Turn on the tool.
  • 5.5 - Plunge the bit into the centre of the metal casing and slide it over to the right, up to the metal edge.
  • 5.6 - Slowly remove the bit and re-insert it on the exterior edge of the casing.
  • 5.7 - Slowly move the bit around the contour of the casing. Turn carefully around the corners.
  • 5.8 - Turn off the tool before you remove the bit after you've finished cutting.
  • Technique with a knife
  • 5.1 - Dust the electrical box with chalk line powder or rub lipstick around the edges of the box.
  • 5.2 - Press the drywall panel up against the fixture to transfer the outline to the drywall. The powder or lipstick will mark the cutting line.
  • 5.3 - Mark all electrical boxes and other openings.
  • 5.4 - Insert a jab saw into the drywall panel, then cut following the cutting line.
  • 5.5 - Position the panel against the wall and verify if the openings are large enough and correctly placed.
  • 5.6 - Install the drywall panel in the same way as the previous panels.
6

Cut the door and window openings

  • Rough openings for doors and windows
  • 6.1 - Clean away all debris and nails from the studs.
  • 6.2 - Measure the panels so that there will not be any joints close to the door or window.
  • 6.3 - Position the panel on the wall and screw in to the studs.
  • 6.4 - Cut along the length of the rough opening.
  • Openings with doors and windows
  • 6.1 - Remove the mouldings and frame around the door or window.
  • 6.2 - Place the upper panel on the floor, aligned vertically, and mark the vertical cutting lines for the edge of the window.
  • 6.3 - Measure the height above the window to determine the horizontal cutting line and transfer the measurement to the panel.
  • 6.4 - Cut the panel and screw in.
  • 6.5 - Place the lower panel on the ground, aligned vertically, and mark the cutting line for the edge of the window.
  • 6.6 - Cut the panel then screw in.
  • 6.7 - Repeat for the door opening.
Drywall corners are tacked into place and then levelled
7

Install metal corner bead on the exterior corners

Finishing the exterior corners involves installing angle reinforcements over the drywall corners. Corner bead, as it is generally known, is available in several materials, including vinyl and metal. The installation steps below refer to metal corner bead. You will need to finish the corners with drywall compound after installing the corner bead, as you will the other joints in the drywall.
  • 7.1 - Measure the height of the wall.
  • 7.2 - Use snips to cut a piece ½" shorter
  • 7.3 - Trim off pieces of overlapping drywall.
  • 7.4 - Press the corner bead into the corner so that both sides have full contact with the drywall.
  • 7.5 - Nail in at the top on both sides.
  • 7.6 - Check for square and realign if necessary.
  • 7.7 - Nail in the entire length.

We also offer tips for repairing drywall if you happen to make a mistake during installation.

Suggested products